As I am expecting my first child I am obviously focussed (perhaps a little obsessed!) with finding some cool pieces for the nursery. Matching, expensive sets in white and oak from the big high street stores bore me to tears and as Aberdeen doesn't have any independent retailers catering for the more eclectic taste, I'm trawling the web looking for some originality and inspiration. Anyone know of some good sites? Let me know!

Meanwhile I am going to try and find an old chest of drawers that I can paint in a funky colour and transform into a changing table. We've been promised a wooden swinging crib already (yay!) and I may just turn the freestanding wardrobe that we own into one suitable for baby stuff.

Photo
I did buy some things from a few high street chains (oh no! *blushing*), but only because they had a nice vintage feel to them and of course with the purpose to mix and match them with my other finds. I bought this gorgeous stripey blanket from Mamas and Papas' 'gingerbread' range and I found some 1/2 price cute retro (Amy Butler-like) fabric at John Lewis last week, which I am going to make into cushions (see photo above). Bought both the pink-orange and blue-green variety, to suit both boy or girl. But hey, as the shop-lady said; baby won't notice anyway.


I wanted to share the link to the fabulous blog Bambino Goodies with you, which features heaps of inspiring articles about all things lovely for kids - including some smashing announcements of discounts and sales. It was here I found the link to the great looking Olli Ella Nursing chairs that are made in London. And - to be honest - they would look stunning in any home, whether you have kids or not! They're not cheap, but since you can 're-use' them in your louge, it seems a good investment. I'm really tempted to get one... what colour would you go for?

Olli1

Ollie2

I also explored Apartment Therapy's kids' rooms site OhDeeDoh a bit more and found some really nice nursery examples:
Deuce1
Gotta love this big bright yellow cot! 

2009-11-norah_sm

A bit of vintage and nostalgia here:

Img_0148

Loving the yellow-grey combination in this one:

2010-07-bline_sm1

Bambino Goodies also does 'Room tours' to give you inspiration, and these rooms sure did:

Amanda-nursery
Nubie1

If you know of any good online shops or places for inspiration, do leave the links in the comments bit below. Thanks! x

---

Continue..

Filed Under: , ,


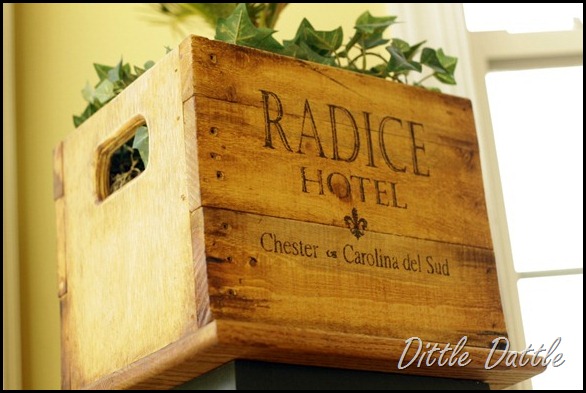
This has to be one of my top favorite projects to date!

Custom Planter Crate

It all started when…..

During my trip to NY, my MIL gave me a plant she had setting on her porch after I mentioned  that I liked it.  Funny thing is that she received it as a gift when she mentioned to her friend that she liked it!  Whoever said New Yorkers aren’t nice?!?!

Sago Palm

Here is my new plant, a Sago Palm.

Tuscan Style Magazine

Last Friday, the Hubs and I had a date night and one of the things that we both love to do is visit the book store.  We’re not nerds, we just like to kill time at the book store between eating dinner and waiting for the movie to start.  Well, I just had to have this magazine even if it was over-priced!  As you can see from my stickies, I am getting a lot of ideas and inspiration…. like this project! 

I saw not one but three plants potted in the most gorgeous crates.

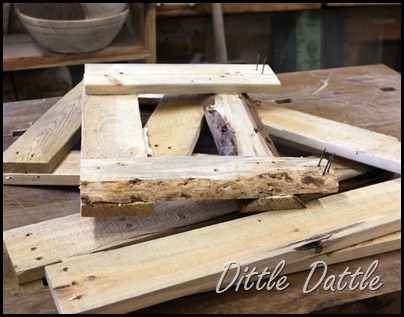
Crate pieces

Low and behold, my father had this pile sitting on one of his work benches the very same weekend.  What luck!!!  He had ordered a new piece of equipment and it was shipped in a crate!  Yes, this project was meant to be!  Wouldn’t you agree?

Okay- so my father opens crates like a two year old opening their presents on Christmas!  But that’s okay because I wanted to customize it and make it the perfect size for my new plant.

DIY Crate

I started by cutting all the sides and 4 small pieces that will be used to anchor the corners.  Check to make sure everything lines up.

adding handles to DIY Crate

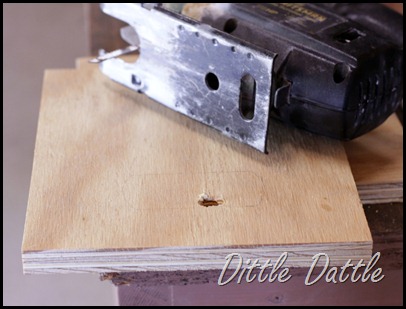
I wanted to cut out handles on the sides.  With a pencil, I outlined where the handles will be, drilled a hole big enough so that I could get the zig-saw blade in, and cut out the handles.

Building a Wooden Crate Box

Next, I routered over the edges of the handle (to take off the hard edge) and sand to a smooth finish.

DIY Wooden Crate Box

Glue and nail all the sides together and then lightly sand all over with a fine sand paper.  I used a light touch, trying to leave the rough wood on the crate face.

Staining Crate

Applied a light golden color stain all over the crate.

Stenciling a Wooden Crate

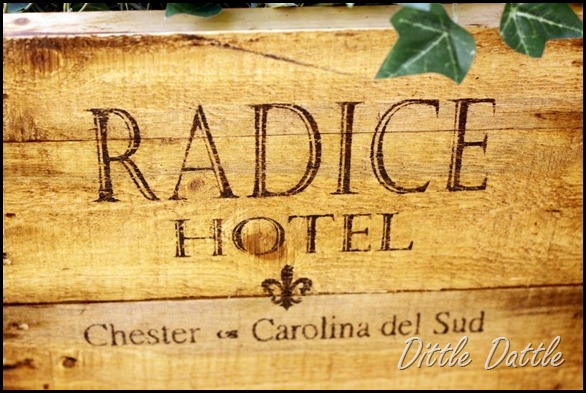
I wasn’t sure what I wanted to stencil on the front but I did know that I wanted it to mean something and not just random words that I didn’t know.  I found a site that would translate English words in to Italian and I was able to come up with this design.   It spells out our last name, our city, and  our state in Italian.  With the three kids and their friends, sometimes I do feel like I’m running a hotel or B&B.

Using my Cricut machine to cut the design out on vinyl, I stuck the vinyl down on the crate and used it as a stencil.  The vinyl didn’t stick very well to the rough wood but using a very dry stencil brush it turned out great.  Actually better than what I expected.  I also applied the dark color over the corners, along the edges, and then lightly sanded over the stencil to age the finish.

Wooden Crate Box

The crate was made a tad bigger than the potted plant to give it room to grow.  Wouldn’t small cube like crates, filled with herbs, be fantastic?!?!

Stenciled DIY Crate

Have a great holiday weekend!

Linking up to these fun parties – go and check out all the projects!

Carrie

Continue..

Filed Under: , , ,


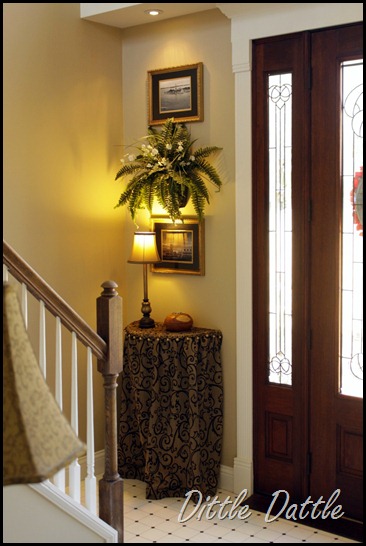
The new addition to the foyer 

a pair of 

DIY Demi Tables!!

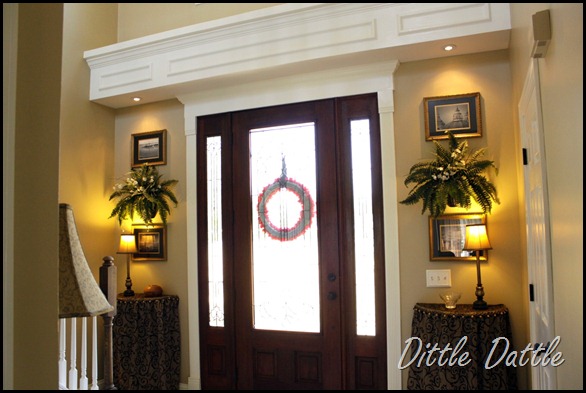
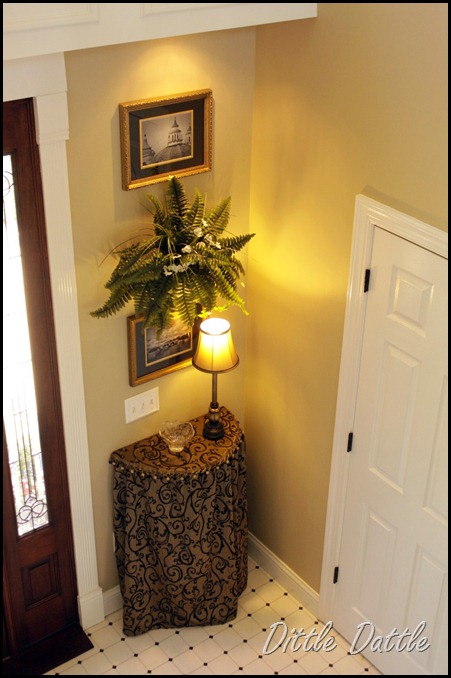
Overhead view of foyer

I am so over joyed at the results!   The table/disk  didn’t cost more than $20, however,  the fabric was a bit of a splurge.  Up till now I have managed to keep my foyer decorating cost very low.

I  realize that the flooring that I currently have needs to be replaced.  For now I’ll just have to live with it, but hoping to have it replaced this fall. 

Foyer Part 2

Okay I’m rambling on about all the things I still want to, need to, wish to do in the foyer and what I really need to be talking about is how I made these tables……

DIY Demi Table

I purchased a round disk, measuring 24” across, at Lowes  (Home Depot no longer sells them)  found in the moulding isle.   Then I had my Dad cut in half for me. 

Demi table Bracket

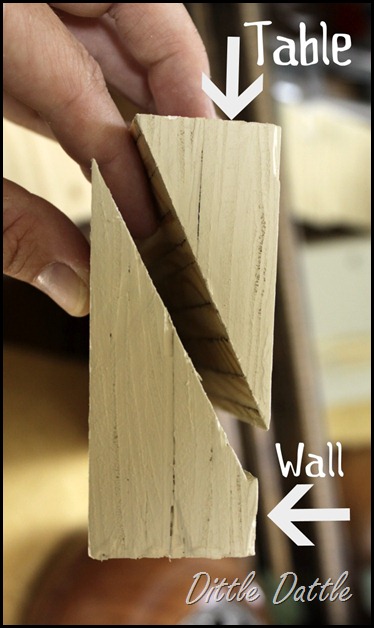
I made a bracket to mount the half round disk to the wall.  My original plan was to mount the disk to the wall using simple metal L brackets but my genius father suggested this type of bracket so if the table on the left side of the front door (at the foot of the stairs) could be removed (when hauling large objects up and down the stairs) with easy.  The wedge in the bracket makes a snug fit and holds it tight but it still can be lifted off.

Foyer Demi table skirt

Foyer Demi Table trim

I found the fabric and trim at Hancock Fabrics.  Actually I found several that I really liked, but this one was still in my budget.  I wanted a fabric that was classic yet with a contemporary flare.  I think this fabric does just that with it’s swirled pattern.

I sewed a simple half skirt and stapled it to the back of the table.  The best thing about the easy accessible brackets is that it will allow me to change out the skirt quickly.  I would love to have several of them for the different seasons and holidays! 

Left side of foyer

Traditional Foyer

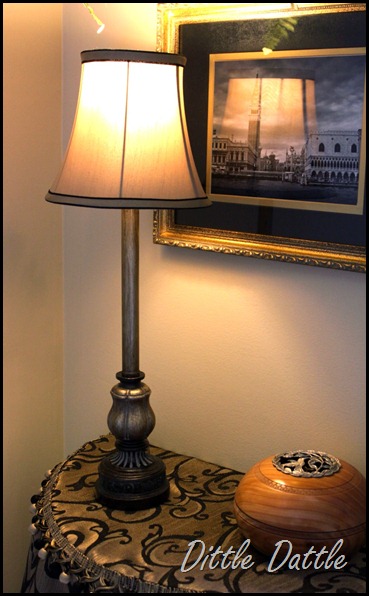
Foyer lamp

I found the lamps at a bargain discount store (Fred’s) on sale for $7.50 each!  The lamps measure 22”, a bit shorter than what I was hoping to get.  Not to worry, I thinking of a way to solve that problem. 

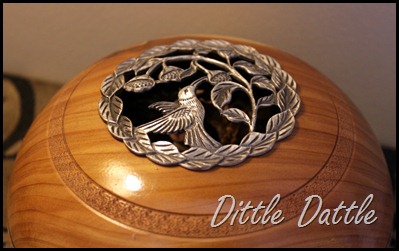
Potpourri Box

Here is a lovely potpourri box that my parents made me!

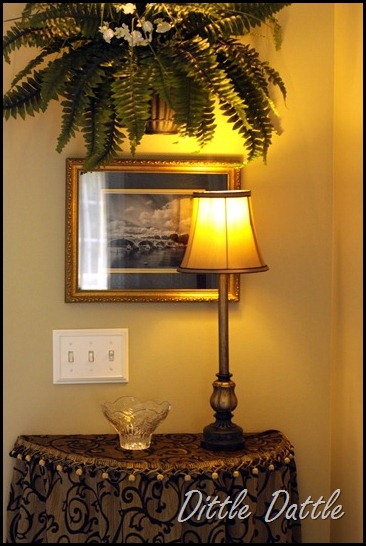
Foyer skirted demi table

Okay, I don’t want to hear it…. I know the candy dish is empty!  I’m a bad hostess.  Actually, that candy dish is just holding the spot until the silver palmetto (SC state tree) dish that I’ve had my eye on goes on sale!!!

Foyer demi table

Phewwwww!! 

That’s a lot of photos for one post!

My foyer is taken on quite a traditional style.  I’ve never felt like I would classify my style as one way over another, but rather, I enjoy all styles to some degree.   I’m a bit nervous that this foyer is leaning heavily on traditional.  I am currently in search for a new mirror for the opposite wall.  Will I shake it up and find something totally unexpected? 

Linking up to these fun parties – go and check out all the projects!

Carrie

Continue..

Filed Under: , ,


CLOSED

I am so delighted to bring you something sparkly today! 

I’d like to introduce you to Shelstring, an online store filled with handmade artisan jewelry.

This lovely boutique is filled with the most colorful and delicate pieces, you’re sure to find something lovely for yourself.  Perhaps one of your  girlfriends has a birthday coming up?  And it’s never to early to think about Christmas!!

Ooooh, the eye~candy!

Earring collage

Necklaces collage

Bracelets collage

Big & Chunky collage

Be sure to check out the entire collection.

Shelstring is offering one lucky winner a

$25 shop credit!

To Enter:

Simply leave a comment saying    “Sparkle”

Additional Entries

(must leave a separate comment for each entry):

  1. Visit Shelstring and get lost among the gorgeous selections.  Pick a favorite piece then name it in a comment.

  2. For additional chances to win, link to this giveaway on Facebook and/or on Twitter, then leave a comment telling where you mentioned it!

{That gives you 3 possible entries!!!!  Please leave 3 separate comments.}

Giveaway ends on Tuesday, July  5 at 11:00 EST.

~~~~~~~~~~~~~~~

Good luck everyone!

Continue..

Filed Under:


Photo VtWonen

Pick your favourite shape plates from opshop and
paint them with free hand /stencils or simply write just a word in each;
 " love" "where" "you" "live" etc.

Continue..

Filed Under: ,


Yep, today you don’t get one but TWO patriotic crafts!  They’re both very simple and took me less than the a few hours to complete both. 

First up…..

A very simple Patriotic Wreath.   I actually had an inspiration photo in my files for along time.  Since blogging I try to save the website with the photo so that I can give credit to the source but because I have had this in my files for so long I not sure where to give credit.  Sorry

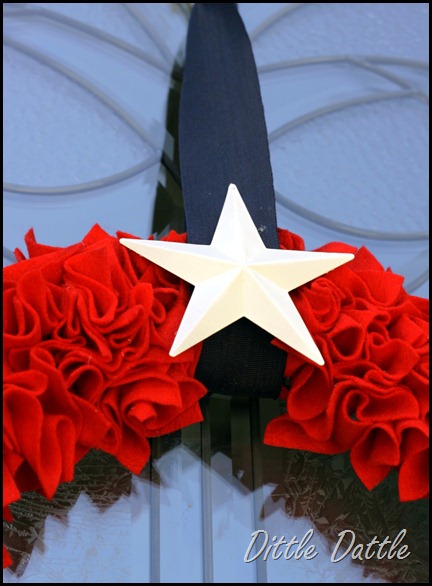
Red felt wreath for 4th of July

The wreath is so simple I think that’s why I love it so much.  Plus, my house sits about 800 feet from the road so most wreaths that I hang on my front door just look like dark blobs but not this one!  It just pops out and screams

“I’m Proud to be an American!”

wreath form

I started with a blank wreath-form bought many years ago, I believe, from the Dollar Store.  About 6 years ago, a Dollar Store opened up in my town.  Less than two years later it closed.  Have you ever know a Dollar Store to close it’s door?  Needless to say, I have not been to a Dollar Store in years.

attaching floral foam to wreath form

Next, I cut up one floral foam into several pieces and held it to the frame with floral wire.

appling red felt to wreath form

I guess I got a little excited working on this project because I forgot to take some photographs.  Here is what I did- I cut 3”x3” squares out of red felt and used hot glue and a crochet hook to poke the center of the felt square into the floral foam.

Patriotic Wreath

Added a blue ribbon and white star and called it finished!

The blue ribbon came off a fleece blanket that I purchased years ago!  It had Velcro on the ends making it so easy to make a loop!  Can you tell I try to not let anything go to waste?

Patroitic red, white, and blue Wreath

I love this wreath!  It didn’t dawn on me until I was actually hanging the wreath that I could use this over again for Christmas and Valentine’s Day! 

Next up…..

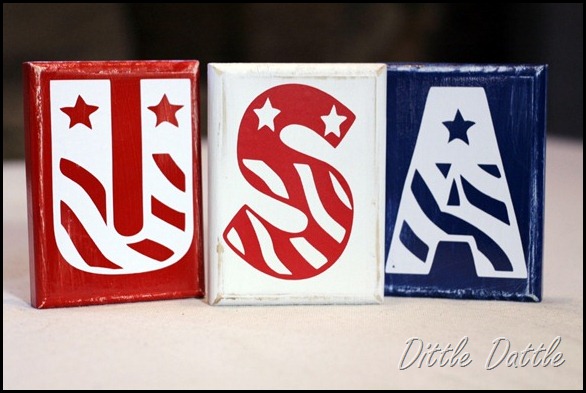
Patriotic Vinyl Wooden Blocks

I cut up some left over 1x4 boards into three blocks, routered the edges with a round-over bit, painted the blocks, distressed the edges, and cut some vinyl on the Cricut machine.  I found this font by Googling “Patriotic Fonts”.

USA wooden blocks- Patriotic Craft

I  just love quick and an easy projects!

Linking up to these fun parties – go and check out all the projects!

Carrie

Continue..

Filed Under: , ,


We have been spoiled... I mean SPOILED by coworkers, friends, and family over the past few weeks! We are expecting our first little one in late July. I am so amazed at the creativity and simply RAD ideas that people around me come up with. Here are just some neat ideas from Baby W's showers:

Waddle on Over to the Duck Pond

Waddle on Over to the Duck Pond Shower Invites from MonogramWedding.com

Gift boxes were provided for guests to fill in with candy and sweets.

The sweets table included candy, cupcakes, and a cake shaped as a  bathtub filled with rubber duckies. 

Rubber duck cake and cupcakes

An adorable duck themed diaper cake

The cooler for the drinks was a baby bathtub from our registry. After the party, they gave the tub to us as a gift. 

Guests played BINGO as the gifts were opened.

This idea is from Abby @ AbbyandAdam.blogspot.com

Guests were asked to write down their gender, weight, height, and date prediction for the new arrival. 


Baby Wilson's Brunch Shower

Brunch Shower Invitation from MonogramWedding.com


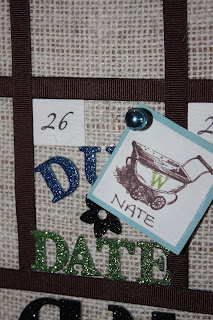
Guests were asked to take their name tag from the mirror and guess the arrival date of Baby W by placing it on the calendar. Depending on if they thought Baby W was a boy or a girl, they would use a pink or blue thumbtack. 

Guests names were placed on this mirror for them to grab and place on the calendar.

"Dad to Be" guessed a boy on the expected due date.

Guests were asked to fill in the blanks on a card using descriptive words to describe what they thought about Baby W's arrival. They made great keepsakes for us and will be a lot of fun to look back at once Baby W is here. 

Lisa made tissue puffs that acted as centerpieces for the tables. 

As a favor, guests filled their own goody bags with sweets in the shower colors.

Welcome Baby Hannah Rose

These photos are from a good friend of ours baby shower. Baby Hannah is due just one week before Baby W! 

Favor boxes with a petite four were given out to guests as they left.
**All paper products were also printed by MonogramWedding.com**

The favor boxes were displayed on a tiered platter.
A banner saying "Baby Hannah".
The invite for the shower was framed and used as decoration.  


Guests were asked to help decorate a onesie for baby Hannah.

The onesie acted as a cute guest book that mom and baby can hold onto for years to come. 

Link up and add your own Baby Shower ideas or Inspirations here:

Continue..

Filed Under: , , ,

AD

Related Posts Plugin for WordPress, Blogger...