I redecorated one of my "top shelf" areas today. I'm ignoring the fact that our A/C return vent is here. Big eyesore, but it's actually better blended-in now. It could almost pass for a shutter now, I just noticed that! What USED to be here were a set of two giant, dark wicker hamper baskets. I've had them since we got married (almost 9 years ago!) and they are completely faded on the back sides because the "top shelf" in our last house had lighting behind it. I've been gathering wooden crates, and I had no idea what I'd end up with today when I started pulling all of this together, but I. AM. IN. LOVE. with how it turned out!
Yesterday was my second trip to one of my best friend's mother in law's house. She is a antique dealer and has oooooodles of treasures. They might not LOOK like treasures when you're digging through dirty piles of cobwebs and spiders, but they are like gold to me. ;) This big frame is the larger of the two I bought for $5 total. All I did was wash it off, I left the crazy paint the way it was. I actually like it that way. The bottom drawer I bought for $2 and added a metal knob from the BAG of knobs, pulls, and metal pieces I bought from her collection! After we treasure hunted there, my sister in law and I went to Rocky Hill Antiques in Exeter and I found the top greenish/tealish crate. It was actually from my friend Luci's section in the store!

The green crate standing on it's end was $2 from my friend's house. The bottom crate on the right was one of the crates I made and stained for the wedding I did last year. I needed to give height to the smaller turquoise crate that I got for my birthday last year. I believe it was from Marshall's or Home Goods. I love how you can marry old and new when you are buying distressed pieces. You can't tell the difference. The tall piece in the back I got from my first trip to the antique dealer's property. It was also $2.
Here is what it looked like with only crates. I toyed with the idea of only doing an arrangement of empty crates, but once I started adding things from other areas of the house, I liked it better. The tall piece on the right is a chippy, architectural-type of candlestick.


Keeping it REAL... here's what the other side now looks like because I pulled so much stuff to finish it the way I wanted. And LOOK at that pile of dust! Ahh! Now I've got some work to do to make the other side equally satisfying. I may have to buy some more stuff from her when I go pick up my new big furniture piece I'm buying for the dining room! I'm SO excited, I can't wait to get it!

One last look... I'm in love!!

Continue..

Filed Under: ,


Ok, so my desktop is finished!  Well, mostly!

I worked all weekend to get it sanded, stained, and sealed.

Hubby helped me install it tonight.  Good thing we're not moving any time soon.  This will be a beast to get out!

Here is the progress so far:


See all that workspace?  I'm giddy!

Cheers!

Continue..

Filed Under:


Old doors are great for re-using, they work well as table top or bed end like below...

Photo Hus och Hem

Continue..

Filed Under: , , ,


Tonight I had a craving. A craving for the BEST brownies ever, like EVER! I shared this recipe a long time ago but its totally re-share worthy for my new friends. This recipe has been in my family longer than i have. I've mentioned that 2 generations before me were professional bakers, right? ;)

This is the first thing I ever baked solo. Bless my late father's heart he ate my first batch of brownies even though I switched the amounts of salt and flour! He didn't want me to feel bad, even though they were the flattest, saltiest things you can imagine.

Recipe
1 cup oil
1 cup sugar
2 tsp vanilla
4 eggs
1 cup flour
2/3 cup cocoa powder
1/2 tsp salt
1/2 tsp baking powder

Mix the first three ingredients, then add eggs and beat well. In a separate bowl combine remaining ingredients. Slowly add dry ingredients while mixing until all is in. Bake at 350 in 9x13 rectangle pan sprayed with nonstick spray. Bake 25-30 minutes or until a toothpick inserted in the center comes out clean.

You'll thank me later. The top has a crisp crust that breaks and crumbles in your mouth, and the center is chewy and delicious. Don't even get me started on the edges!

Continue..

Filed Under:


I really need to consider changing this title to something having to do with Saturday!  I never get these up on time! :)

IMG_1646

Adventures of Our Fami-ly started with a side table that had not top and turned into this cuteness!  The color is wonderful - check out the subtle difference in color along the details!


My Champagne Taste definately rocked this piece making it look like a million bucks!  It looks perfect with the bright wall color! I love this whole set-up!


Embracing Change is at it again with this awesome nautical chevron dresser!  Yes, please!


Mommy By Day {Crafter} By Night shared an awesome tutorial for this amazing kindle case! Don't you love the bird clasp! Wish I had a kindle to store in this beauty!


Maxwell House Interiors did a FANTASTIC job making over this bathroom! You need to check out the entire makeover - it has such a comforting, lakehouse type feel!  Great job!

If you've been featured, feel free to grab a button!

CRAPTASTIC


Cheers!

Continue..

Filed Under:


This next Cottage Pantry addition tempted me with it's multitude of uses in addition to it's storing potential.

(Hibiscus sabdariffa) A valuable plant for making cranberry-flavored bright red beverages, jelly, pie and tea. Much grown in Asia and the mid-east as the flavor is wonderful. A tasty sauce can be made by boiling and sweetening the fleshy calyxes; the leaves are also used to make a drink. The entire plant of this Hibiscus is red and very beautiful. Start early, unless you live in the far-south. Citrus-flavored flowers are delicious on frozen deserts. This plant has too many uses to name here. Collected in Thailand.

This is the Thai red Roselle * offered by Baker Creek Heirlooms. I became rather intrigued with the thought of a new twist in our teas & summer drinks grown on our own vs. buying. Upon more research, discovering this plant has an amazing array of uses & potentials, I KNEW I had to share & of course grow it ourselves.It has a cranberry like taste, not sweet, but not overly tart and of course rich in Vitamin C as well as antioxidants. Although Wikipedia's source * shares a massive piece on it's uses & growth, let's delve into a few here. Between medicinal, fiber & blow your mind array of EDIBLES!
lets hop straight to dessert with a Hibiscus infused Lemon tart!
The mingling of lemon & hibiscus in a creamy light textured tart with this amazing flavor filled crisp crust won us over from first bite. Not too mention, a great way to incorporate some of that homemade Limoncello!
Maybe you prefer cheesecake? Then how about a  fat free  Oatmeal Cocoa Crusted Hibiscus Cheesecake! Topped with a Hibiscus Jam & syrup...
From Cafe Nilson with the cheesecake baking challenge. The recipe link is here*
Who knew you could make a great tasting JAM from Roselle Hibiscus? Wonder how it tastes with peanut butter... or even better Nutella! {We are planting hazelnut trees this spring due to the insane love our kids have for this expensive alternative to peanut butter}.
This is one useful flavoring flower! Everything from Hibiscus infused salt for Fin Tuna to Popsicles , a multitude of drink varieties, as well as ice cream and cookies.  I found over 60 recipes for Hibiscus at this link* {http://www.tastespotting.com/tag/hibiscus}

As for growing Red Roselle ,aka Hibiscus, one must take in mind it is not a northern acclimated plant. To grow in the north, we must start the seed indoors as early as January or February. Do not plant out until temps are staying at least 65-70 F degrees. When the temps are getting cold, well before that first frost, pot a few up * place under grow lights so you are able to let the smaller later blooms go to seed. Replenishing your supply for the next year. Mother Earth News has a very nice article for further reading on growing your Thai Red Roselle over at this link*.
For reading more on it's medicinal use as a tea for ailments such as high blood pressure, lowering of cholesterol & prevention of liver damage from acetaminophen, I direct you to yet another link* due to the mass of information.
Another use  I discovered which is non edible related, Hibiscus is also used as a Natural bright red dye for fabrics. I am experimenting this winter on natural plant derived dyes on cotton and hope to make my way to the art of hot Batik. I have so many plants & flowers we grow that are great for naturally dyeing fabric. I'm starting with Flour sack cotton towels to use as  a cover for my rising yeast breads. My SIL has an embroidery machine so I may send some off to her for putting a few Black silhouette roosters on the edges...

Who knew that the main ingredient in red zinger teas would be so versatile?! From drinks to desserts to condiment flavoring. Lots of potential packed into a plant that will also look outstanding with it's purple red hues against all that greenery in the garden.
Our next & last Cottage Pantry Potential is coming soon. Not as exotic or rare but often overlooked for the winter Pantry, being American diets have turned away from their "Roots"..

Sweetest dreams,
~Tammie
1/18/2012**I must add this to my post, when brewing the hibiscus, steep it in hard boiling water {take water off the stove once at hard boiling level then add the roselle} by itself for at least 10 minutes before adding any other tea ingredients. I have personally found that by doing this, the Roselle gives a much "deeper" berry taste before adding Rooibus to the tea pot. I also add a hefty tablespoon of Rose hips when I do the roselle hibiscus. The 2 make an excellent tea which the children & I agree it is much like a berry juice! Just a tad of sugar or honey for balance is all you will need. This has become a huge hit with our tea times and I find myself having to make a dash to the co-op for more Hibiscus now that the large Jar is almost bare. Not the average tea taste. Very fruity, Berry like. Sure to please almost any non tea drinker.

Continue..

Filed Under: , , ,


In college, the choir that I belonged to spent every spring break touring one section of the country. We would perform in churches and then divide up into pairs to stay the night with the brave parishioners who were willing to host us. Some nights I stayed in suburban mansions and other nights the accommodations were a little less roomy (a trailer in Indianapolis comes to mind). The very first night on a tour of the Midwest my freshman year is the one I remember best. The house was average and the family was welcoming -- fixing hot cocoa and inviting us into the kitchen for conversation. That night, my friend was placed in a small guest room while I was put up on a mattress in the living room. I might have been disappointed if it weren't for the fact that the fireplace was lit and its warmth kept me company most of the night. Since then, the dream house in my mind has always included a working fireplace (though the house itself has morphed from a city loft to a lodge to a stone cottage throughout the years). Even when there is no possibility of setting a real fire, a mantel can add a focal point and architectural interest to an otherwise bland room. In the summer, it can house a giant bouquet of dried hydrangeas. In the winter, a mass of candles approximates the effect of a real fireplace. Fitting a mantel with an upholstered piece of plywood turns it into a headboard with a handy shelf for books. A mantel headboard gives new meaning to the idea of falling asleep in front of the fireplace.


Images: Vogue Living magazine, November/December 2011 issue. Period Living magazine, October 2010 issue. BBC Homes & Antiques magazine, September 2010 issue. Country Living magazine, British Edition, April 2011. Girl at HomePoetic Home.

Continue..

Filed Under: ,


I brought out my Valentine decor from last year. I forgot how much I have! The rose balls were made out of streamers. I made the hearts hanging on the window out of old sweaters I picked up at thrift stores. The only thing new is the chippy looking thing on the right. I don't know what to call it but it's BEAUTIFUL! I found it in the new spring section at hobby lobby and it was 30% off. It will definitely be out year round at my house!

Continue..

Filed Under:


It turns out that Kelly at Eclectically Vintage. . .


has deemed my blog “on fire” and awarded me this big ball of flame. . .

Picture

Kelly has wonderful and inspiring ideas that you will love- so go check out her blog! She's been featured many of times for her talent. I've even featured her blog on my First Blog Award post.

Thank you so much Kelly!  

Continue..

Filed Under:


I decided to use some inspiration I found on Pinterest...
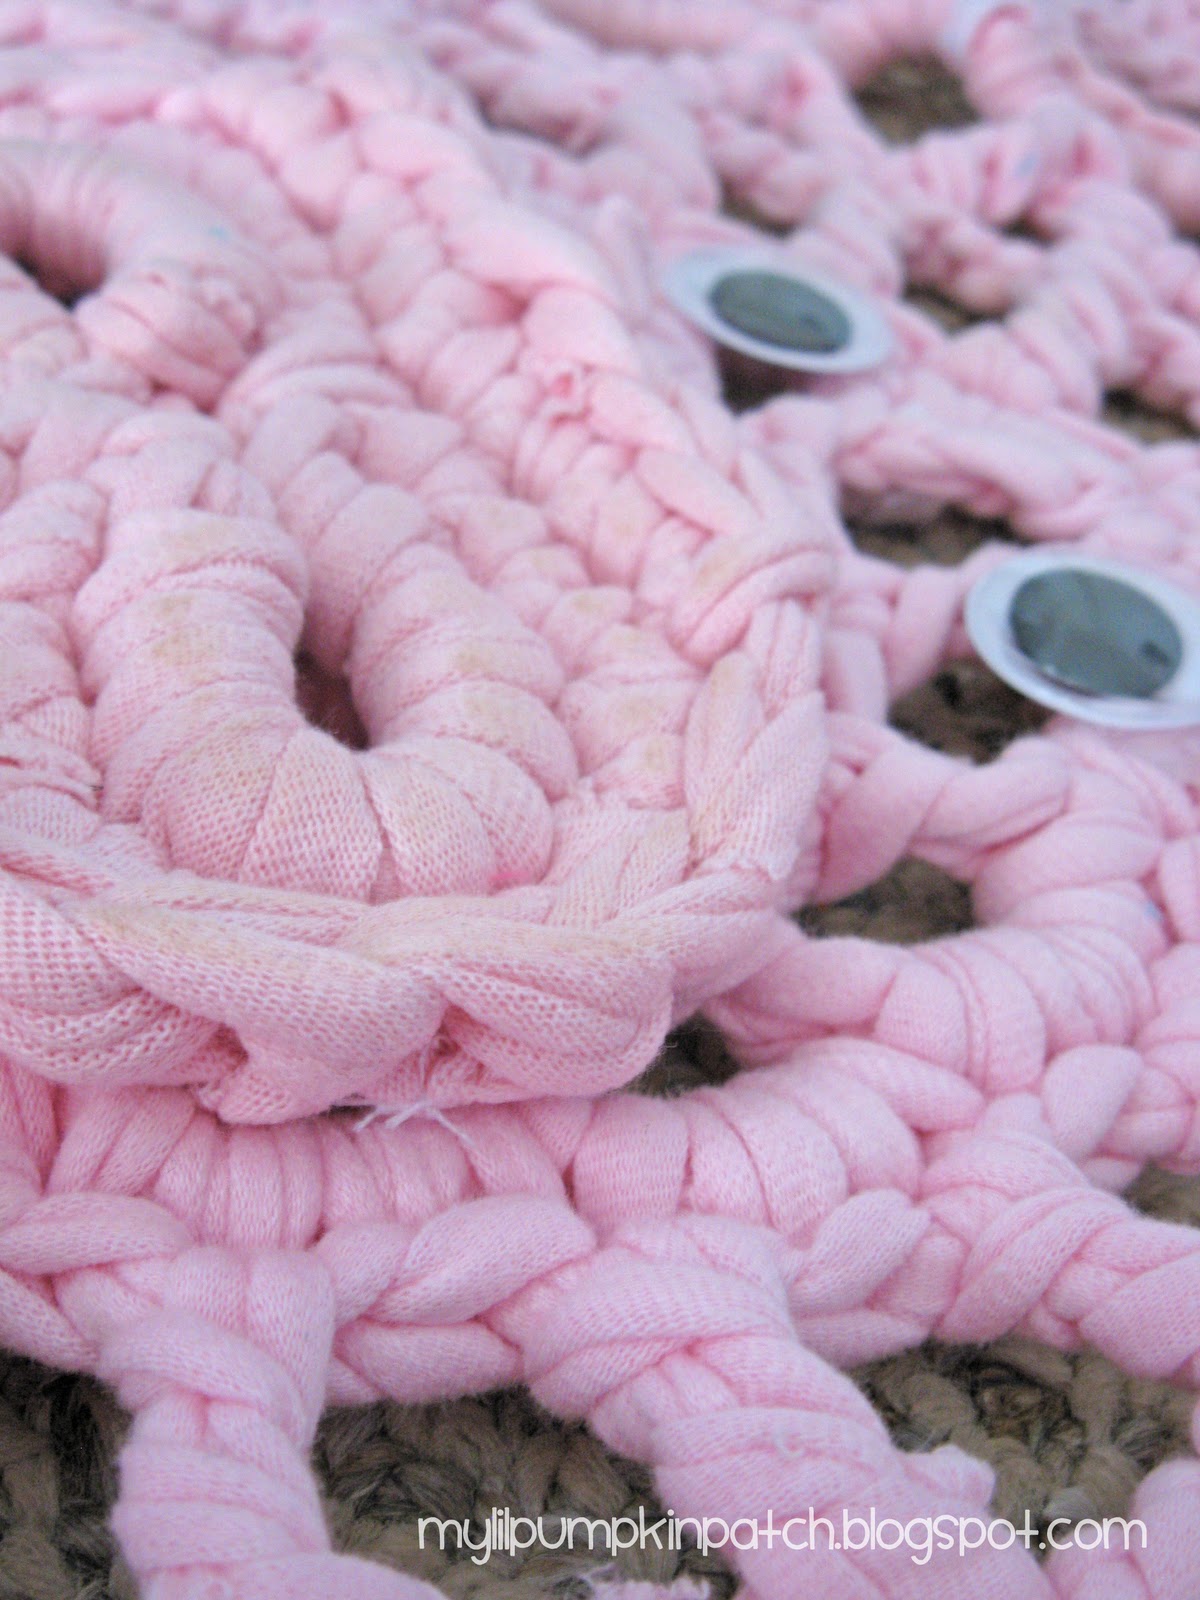
Cute rug, huh?!  You should head over to Happy Lizard Hill and read the story - it's pretty funny!  Well, my aunt collects pigs and her birthday was coming up, so I decided to give it a try.
I bought about 5 t-shirts and made yarn out of them (I googled how to do it), and then I found a doily pattern and started crocheting.  I didn't make the whole doily, but just kept going till it was the size I wanted.  I made a huge doily and then the ears and a snout, and of course it had to have googly eyes!
The whole thing was ripply after I got done and I was a little worried, but I ironed it and it worked perfect! I used a squirt bottle to dampen and then ironed and it got pretty flat and stayed that way.  I love the way it turned out...oink, oink!

Continue..

Filed Under: , ,


I know that I am not the only woman who craves chocolate when the hormones are running high!  Well, let's be honest, the hormones don't have to be out of whack to crave the chocolate, they just have to be present...and that is always with me!  I have had a huge hankering for chocolate cake, and not just any cake...Beatty's Chocolate Cake!

Several months ago, I was looking for a chocolate cake recipe and found, what has become my go-to chocolate cake recipe.  It is super moist and chocolaty, plus with the frosting...oh, the combination is explosive!


Just looking at this picture makes me salivate!
 It's what I am craving RIGHT NOW!  I am going to share the recipe with you and go make it for dessert tonight.  I am planning on eating a slice before then, though. Ha!

Beatty's Chocolate Cake w/ Chocolate Buttercream {Recipe}
Slightly adapted from Ina Garten

Ingredients

  • Butter, for greasing the pans
  • 1 3/4 cups all-purpose flour, plus more for pans
  • 2 cups sugar
  • 3/4 cups good cocoa powder
  • 2 teaspoons baking soda
  • 1 teaspoon baking powder
  • 1 teaspoon kosher salt
  • 1 cup buttermilk, shaken (I use cream)
  • 1/2 cup oil (I use a combination of olive and coconut)
  • 2 extra-large eggs, at room temperature
  • 1 teaspoon pure vanilla extract
  • 1 cup freshly brewed hot coffee
  • Chocolate Buttercream, recipe follows

Directions

Preheat the oven to 350 degrees F. Butter two 8-inch x 2-inch round cake pans. Line with parchment paper, then butter and flour the pans.
Sift the flour, sugar, cocoa, baking soda, baking powder, and salt into the bowl of an electric mixer fitted with a paddle attachment and mix on low speed until combined. In another bowl, combine the buttermilk, oil, eggs, and vanilla. With the mixer on low speed, slowly add the wet ingredients to the dry. With mixer still on low, add the coffee and stir just to combine, scraping the bottom of the bowl with a rubber spatula. Pour the batter into the prepared pans and bake for 35 to 40 minutes, until a cake tester comes out clean. Cool in the pans for 30 minutes, then turn them out onto a cooling rack and cool completely.
Place 1 layer, flat side up, on a flat plate or cake pedestal. With a knife or offset spatula, spread the top with frosting. Place the second layer on top, rounded side up, and spread the frosting evenly on the top and sides of the cake.

Chocolate Frosting

  • 6 ounces good semisweet chocolate
  • 1/2 pound (2 sticks) unsalted butter, at room temperature
  • 1 extra-large egg yolk, at room temperature
  • 1 teaspoon pure vanilla extract
  • 1 1/4 cups sifted confectioners' sugar
  • 1 tablespoon instant coffee powder
Chop the chocolate and place it in a heat-proof bowl set over a pan of simmering water. Stir until just melted and set aside until cooled to room temperature.
In the bowl of an electric mixer fitted with a paddle attachment, beat the butter on medium-high speed until light yellow and fluffy, about 3 minutes. Add the egg yolk and vanilla and continue beating for 3 minutes. Turn the mixer to low, gradually add the confectioners' sugar, then beat at medium speed, scraping down the bowl as necessary, until smooth and creamy. Dissolve the coffee powder in 2 teaspoons of the hottest tap water. On low speed, add the chocolate and coffee to the butter mixture and mix until blended. Don't whip! Spread immediately on the cooled cake.

NOTE: Last time I made this cake recipe into cupcakes and didn't need as much frosting, so I cut the buttercream recipe in half, didn't add the yolk or the instant coffee and it was still fabulous!

This cake is actually easy to make and the frosting is also a cinch!  Now I can hardly stand to wait another second to make it.  It just goes to show you I have absolutely ZERO will-power!

Do you need something to make you feel a little bit better about giving into your craving and consuming chocolate?  There are studies that have shown that eating chocolate reduces risk of stroke in women, prevents heart disease, lowers risk of miscarriage and more!  So no more feeling guilty; indulging a little can be a good thing!

Continue..

Filed Under:


I guest posted at Giggles, Glitz and Glam in December and wanted to share that project with you here.  It is really quick and (would have) only taken 5 minutes, (if I knew exactly what I was doing!)  I am going to share with you how to make this simple glass bottle snowman.
This would make a perfect last-minute gift or decoration.
 I used vinyl, wire, a glass bottle I have had for years, pliers, a hole punch, and book pages (not pictured).
 First, I made a handle around the top of my bottle with the wire.  I have seen this on pinterest and love the look!
 Next, I punched some holes out of my vinyl (much faster than getting the silhouette out).
 The next part is pretty self explanatory, but I stuck the vinyl circles in a face shape.  Next, I rolled up several book pages together and stuck them inside, and ta-da!
I love the simplicity of this project and it is so easy to change if I get tired of it in a few years!  Thanks for letting me share my project with you! Hope you all are having a Happy New Year!

Continue..

Filed Under: ,


Here we are in January yet the days have provided temps comfortable enough for pruning a few apple trees. Plenty of "tree suckers", straight & long which had me thinking of Rick Pratt the Willow Furniture maker. Remember him? He was the first Adventure video I attempted to make. Not the best of filming & editing but plenty of great info & tips on using wood to bend & shape.
All those cuttings had me dreaming up what I would do with them.This year I will attempt to build an arched arbor tunnel based on this one for inside the garden:
This will be for the climbing beans & peas to twist & turn on this summer. Simple and pretty. A bit more saplings will be woven on the sides providing more spots to cling on. I envision about an 8 foot long section lined on the garden path starting from where my sand, brick & river stone entry ends.
I'm also going with Trellis style tomato supports made from bentwood. A bit ambitious, ay? No worries. I've got the time.
A short how to for a twist on the style I am after, found at this link* from Vegetable Gardener.
Being I will have 30-35 Amish paste tomato plants, mine will by far be simple yet useful being  they will grow from one end of the garden to the other. O.k, maybe not too simple in looks. More like this style in 5 ft long sections:
The Captain & I paid a visit to the library where I picked up a great book I have previously poured over titled: Making Bentwood trellises, arbors, gates & fences Author Jim Long . If you can access a copy, I highly recommend it for some bentwood inspiration. 
Now on to the subject of living mulch. I have tried hand tilling weeds out till I threw my hands up & walked away. I've tried Weed blocker cloth which just had weed seeds growing ON TOP & rooting down through the breathing holes. I even fell for & did the cover crop of winter rye grass , said to be a weed inhibitor {by the way, that method was worse then any of the others.}. And now I have come to the conclusion, I have nothing left to lose by trying one more method of weed prevention & soil health improvements. Crazy? Yeah. I think we settled that thought a long ways back.
I know what your thinking. Clover? Really Farm Chick? People try to get RID of clover, not encourage it. People! Hear me out. It has so many con's going for it and the downsides are not that worrisome {see winter rye & hand weeding belly aching comment above}. This whole idea came about while looking through one of the many seed catalogs {for like the 7th time}, when I spotted white dutch clover with a bar table describing it as a "living mulch" that it also did not go higher then 8 inches. hmmm. My interest is peaked. More like I couldn't stop thinking about, which is another reason why The Captain took me to the library. I was driving him crazy with "growing stuff" chatter and something about forest floors & Polyculture. Of which he thought I somehow switched to wine making and polyculture was a new kind of yeast I wanted... anyway, there was not a single book in the entire section on this matter. So I took to my personal library... The internet. Where I found this win me over post & encouraging reference point for the next weird step I take in experimenting with how my garden grows. Actually, they did my homework for me, with other forums & sites echoing all he shares.
  1. Less Weeding
  2. Retains Moisture
  3. Withstands Traffic
  4. Nitrogen Fixer
  5. Improves Soil Tilth
  6. Attracts Pollinators 

As for it competing for nutrients, they had this to say {& I quote}:
On a side note, here’s a good read about polycultures being more productive than monocultures from a recent study at the Virginia Institute of Marine Science:
“…analysis shows that plant communities with many different species are nearly 1.5 times more productive than those with only one species (such as a cornfield or carefully tended lawn), and ongoing research finds even stronger benefits of diversity when the various other important natural services of ecosystems are considered. Diverse communities are also more efficient at capturing nutrients, light, and other limiting resources.” (Source: ScienceDaily.com via Virginia Institute of Marine Science)
Thanks to Seattle Homestead { :http://www.seattlehomestead.com/136-6-reasons-i-chose-white-clover-as-a-living-mulch/ , } our garden takes on another experiment.
Let's hope this one works out in our favor.
Oh! And did I ever mention how this last summer during the many road trips I had taken our children on,I seemed to always end up with getting us lost BUT never failed to discover a chicken statue on the road side EVERY time? Well marine was visiting & of course I took her on a mini road trip that I of course got us lost on the back roads. And what did we spot? Another chicken statue! 
I guess that's my new thing... Not the getting lost {as if that would ever stop} but the Chicken statues. Wonder how long the streak will last...

Sweet dreams,
~Tammie

Continue..

Filed Under: , ,


Wow. That was some month and I don't mean the annual festivities around Christmas and New Year.

On the 9th of December I became a mum! I gave birth to Dylan, my beautiful little boy, and I have been busy with him ever since. I knew it was gonna be busy - but blimey, those first few weeks are just mental. We have got to know each other a bit better now and although there's no such thing as a routine yet, I feel a little bit more in control. Hubby has gone back to work today, so it's just me and Dylan now! Eek! Hence my escape to the blogosphere, while Dylan is doing a nap. I never know when he wakes up and needs my attention, so I better make the most of it. Hopefully he sleeps LOTS so I may even be able to squeeze in a bit of sewing....hmmm, I know, wishful thinking.


Continue..

Filed Under:

AD

Related Posts Plugin for WordPress, Blogger...