Quick Scrap Fabric Bag
Thursday, February 23, 2012
 My little girl turns 8 this week and she is getting her own set of scriptures. Of course she needs a bag to carry them to church.
 So I whipped this
little bag up for her
in about an hour.
 I had some strips left over from another project so I lined them up. Each strip is folded once lengthwise.
Sew each strip together and topstitch over the seam. Then sew the sides and bottom together.
To make the square bottom, fold the corners in like this and sew in place.
I added some ribbon trim to the bag. Do this step now before adding the inner lining.
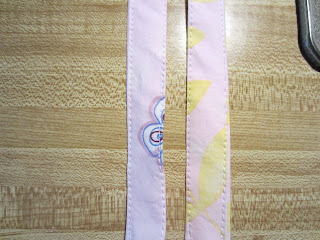
We need some handles so I cut two strips like shown.
Now sew down the fold line.
Stitch down the other side too.
Now for the pockets. I cut another piece exactly the same size as the main bag. Before you sew the sides and bottom together, add some pockets. Here's where I layed it out to make sure it will fit.
I sewed the yellow to the wrong side of the pocket fabric like shown.
Fold over the yellow once like shown.
Then again and pin in place. This creates a casing. You could use Bias Tape here too.
Iron the sides in on the pocket.
Pin in place and top stitch the pocket to the fabric. I added one to each side of the inner fabric.
Create the box shape as shown above and stitch in place.
Turn the inside bag inside out and slip inside the outer bag.
The bags should fit perfectly inside each other.
Fold over the top edge of the bag, add the handles and pin in place.
Here's some more views.
Top stitch all the way around the top of the bag, backstitching a few times over the handles to secure.
And done.
Cute.
She loved it.
Labels: Sewing tutorial


0 comments:
Post a Comment