Showing posts with label Nursery. Show all posts


After hours and hours of looking for the perfect mobile for Marlo's crib, I decided to just make her one (shocking!). I am not a fan of the big bulky mobiles that attach to the side of the crib. I am well aware that there might come a time when the lights, music, spinning, vibrations and whatever else those things do might actually come in handy but personally, I like the simple look. She seems to be very interested in anything that has multiple colors and dimension (picture frames on the wall, chandeliers, window treatments, and her all time favorite...fans). 

I absolutely love how it turned out (I know I say that about every project I put on here... but that is why it is on this blog. There are many projects that are not blog worthy and therefor end up in a closet or garage).  I had purchased Marlo's curtains from World Market. I bought an extra one along with some coordinating fabric and a good friend of mine turned it into her bedding (read more about that here). Since we didn't know if Marlo was going to be a "him" or a "her", I decided to wait on the mobile. Since she is now all girl and has more pink than I ever imagined would be in this house, I figured I had to make the mobile a tad girly. 

Here is the process (lots of photos...but it actually only took a few hours)...

Supplies: Cricut, scrapbook paper, a medium embroidery hoop, string or fishing line, and a wooden bead

First, I cut out all of the shapes using the autofill on my Cricut.

I chose to copy the print and colors of the curtains (except I added a little splash of pink to girly it up!)

Using leftover stain, I stained the inside piece of the embroidery hoop. I also stained a small wooden bead to cover the knots holding the hoop in position. 

Using a 16 gage needle, I made holes in all of the cutouts. 

Using dark brown string, I tied 3 knots before I strung on a shape. 

I did 6 shapes on each string and made 9 strings full of random shapes and colors.

I tied each string of shapes onto the hoop keeping them at similar lengths. Next I tied 3 strings onto the hoop and gathered them about 8 inches above the hoop. I placed the bead here to cover the knot. I then cut and attached a long piece of string to attach to the ceiling. 


THE REACTION!....
....SHE LOVED IT!!


Linked up on:

Continue..

Filed Under: , , ,


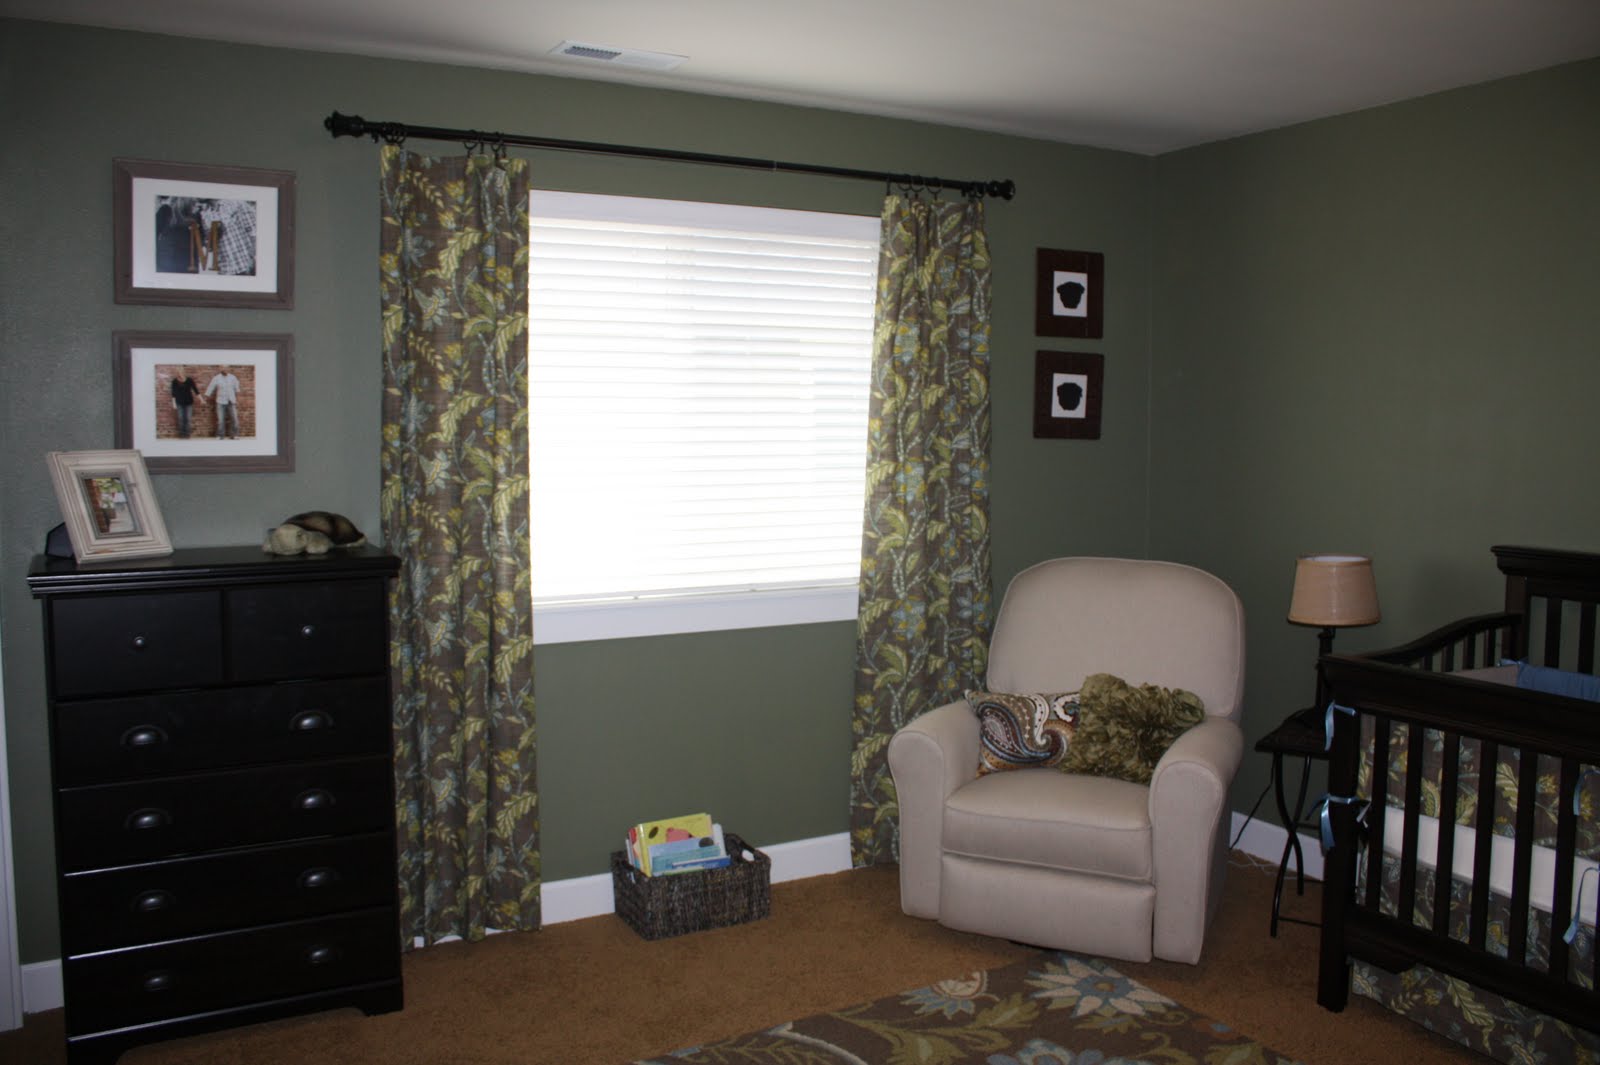
I finally found the time to take some photos of Marlo's nursery. We welcomed Marlo on July 22nd and have loved every second of our little peanut! While we were pregnant with Marlo, we decided not to find out the gender. Marlo was then known as "Baby W". We attempted to create a gender neutral nursery. The colors were gender neutrual but you could argue that the print of the curtains, rugs, and bedding was a bit feminie. If we had a boy, we decided that we were going to go the "Where The Wild Things Are" route or "Duck Pond" to add a little more masculinity into the room. We ended up having an adorable little girl so we have not made any changes to the decor. Marlo seems to enjoy it so far.


Nursery Before:


Stripes.....YIKES!

Nursery After: 
 I purchased an extra curtain and a friend of mine from work (Grace) made the bedding! It turned out perfect!

 See how I redid this frame here.
 I purchased the curtains at World Market and was lucky enough to find the perfect rug at Target!
 Check out how I made the "M" monogram here.
 Our sister-in-law picked up these wall decals from Sherwin Williams. They fit perfectly with our theme!
 I got my inspiration for this wall form this nursery that I found on HGTV's Rate My Space.
Check out how I made the pug silhouettes here.

Overall, we were very pleased with how the nursery all came together. It is a very calm and relaxing room. Check out and vote for our nursery on HGTV's Rate My Space!

Materials used in the nursery:
Curtains, bedding, changing pad cover: Tamara collection from World Market
Crib: Delta Biltmore Crib
Dressers: Amazon
Pain Colors: Grasshopper Wing and Studio Taupe (both Behr brands)
Black Shelves: Target
Rug: Target
Mirror: HomeGoods
Chair: Best Chairs in burlap from BabyPhases

Continue..

Filed Under: , ,


New Dining Room Decal
A new addition to our dining room courtesy of Abby at Uppercase Living. We love it and can't wait to do more vinyl sayings, project, and artwork around the house! Check out her projects that she has done at her house here!


 Monogram Artwork for Nursery
I also took a print that we had shoved away in a closet and gave it an up-do with some UpperCase Living decals.  I took one of my many paint samples (Mineral from Bear) and painted over the martini glass and shaker. The martini and cocktails is not really the look we are going for in the nursery ;) 
 After a coat of paint, I followed the application instructions and started adding the vinyl decals.


 Good by martinis and cocktails, hello monogram artwork for our new arrival!

Continue..

Filed Under: , ,


Here is a quick sneak peek of Baby W's nursery. We are waiting for a few more things before I feel like we can call it "done" but here are some "in progress" photos:

The changing pad cover was made from a towel I loved, courtesy of our friend Grace.

Pug Silhouettes (click here to see how I made them)

Continue..

Filed Under:

AD

Related Posts Plugin for WordPress, Blogger...