Well, I thought this day would never  come but I am so happy to show you my new painted foyer!!! 

Oh, before I go into this post to far, I want to apologize for missing this weeks Amaze Me Monday party.  It’s been a long weekend and by Sunday night I was completely wore out!  I honestly didn’t have the energy to sit and focus at the computer.  The good news is that for the last two nights I slept threw the entire night (minus a few trips to the bathroom).  I’m thinking the combination of finishing the poison oak medication and having this foyer done might have something to do with it!

{Before}

_MG_6443

{After}

Foyer Remodel

I know…  Amazing!!!  I am so smitten with the results.  This has been a project floating around in my head for a long time and now it’s finally coming alive!!  There is still a few things to do.  We want to replace the floor, and I still need to restain the stairwell to match the door.

The color we choose is Sherwin Williams Macadamia for the wall and Moderate White on the ceiling.  The trim is a Benjamin Moore match of Cotton Balls.  It’s soft and warn but yet still a true white.

Don’t laugh but I know that the chandy is missing a few shades.  I went to the store and bought 12 during a big sale only to get home and realize that I need 15!  I searched high and low for the 3 matching ones but never found them.  The 12 original have faded on the side facing the window over the years, so guess I just need to replace all 15 shades. 

Let me show you more photos.

_MG_7928 This is what the room looked like on Friday when the painters left.  The colors are off in this photo but I wanted you to see the shelf.  This in not what I envisioned.  I really wanted the shelf to be an extension of the mouldings around the door.  So in less than 24 hours I added moulding and painted out the shelf.  

Trust me, I was asking myself what kind of “anal” do you have to be to repaint less than a few hours after hired professional painters leave?!?!?

But don’t you agree??? 

The shelf is truly amazing painted out in white!

Foyer makeover!   Remember the shelf and the Google Sketch-up drawing that I showed you?  Didn’t it turned out just like my sketch?!?!  Love it!

Foyer After Entering from the family room.  I most definitely will be replacing those gold tacky door knobs with a beautiful oil-rubbed bronze set. 

Door casing Detail

Here is a close up of the door casing that I created all from Lowes stock molding.  This took about 2 hours to do including removing the old door casing.  What an easy upgrade with such powerful impact!    You can see the wall paint, ceiling paint, and the trim all together in this photo.

DIY Moulding

I added a stock crown moulding under the ledge and my father and I made the picture frame moulding on the front of the shelf using MDF. 

Moulding in the foyer

I can open my front door with pride now!  I use to be so embarrassed. 

Moulding in the foyer I have a few ideas on how to decorate the sides of the door and while talking it over with my parents you know they had to add their wisdom to make it even better!  Now to find the time and the money. 

On a personal note, my son has some really big dirt bike races coming up in this month and I will be traveling with him.  I hope to keep post regularly but I am still without my own computer {it was fried in an electrical storm we had a month ago}.  Oh how I miss my computer as it was set up with all the programs that I use on a regular bases.  I’m currently sharing the Hubs lab top.   So if you don’t hear from me just know that I am out-of-town.  In fact the end of this weekend I will be heading to the great state of Texas. 

Carrie_thumb[5]

Continue..

Filed Under: ,


Today my husband and I went for a lovely road trip along the east coast of Aberdeenshire, to celebrate our first wedding anniversary and generally enjoy the sea breeze and sunshine. We stopped off at pittoresk fishing village Johnshaven, ate fresh strawberries and ice cream at a farm shop and found some nice pieces of driftwood on the beach of Montrose. We also paid a visit to the (in)famous Steptoe's Yard in St Cyrus, where you literally trip over all kinds of junk. My treasure hunting pals suggested many times that I should really go and have a look, so we did...

Hmmm, what can I say? Overwhelming! I can honestly say I have never in my life seen so much junk piled up in one place. Millions of plates and cups scattered on tables, one whole shed full of glassware, a barn filled with thousands of chairs, cupboards, tacky prints, mirrors, old records, suitcases, tables and more. Not to mention the endless boxes of rusty old tools lying around outdoors. Phew - good lord! Now you know I love junk and am not afraid of some treasure hunting and seeing the potential in old furniture. But today at Steptoe's Yard I felt like running a mile! How funny. I guess when you "just go for a browse" you get lost in a sea of rubbish and just want to get the heck out of there (I did!). When you know what you're looking for, I am sure a treasure awaits you. Seriously, if you can't find it at Steptoe's Yard, it simply doesn't exist.

Steptoe's Yard, St Cyrus
http://www.steptoesyard.com/

---

Continue..

Filed Under:


I have several pre-blogging projects that I have been want to share with you and just love  Sugar & Spice in the Land of Balls & Sticks once-a-month Before Blogging Throwback party!

In lou of having painters in the house, I thought I would share with you a little wall mural that I painted shortly after we moved into the house.

faux painting

Don’t laugh now!  I never said I was an artist but I really wanted to add lil’ something to this room.  A Tuscan Vineyard, please.  I call this room the breeze way but it’s a really a pass through area between the kitchen and the garage.  Okay it’s a mudroom by most standards. 

The wall color:  the base is a golden yellow (leftover from the kitchen) and because there wasn’t enough to give it a complete coverage I used a  brown/taupe paint (leftover from the family room) to make a glaze and washed/swirled it over the yellow base paint.  Then added some random fleur de lis stamp design in copper.

Sand texture

To add even more authenticity to the stone arch, I added some sand to the paint.   I hope you can see it.

destressed mantel

The mantle mounted underneath is something leftover from the construction of the house.  I distressed it with a hammer, screw drivers, and chains. 

It’s time for a change.  Once I finish remodeling upstairs, this will most likely be the  first to go.  

Carrie_thumb[5]

Continue..

Filed Under:


CLOSED

I have another fabulous giveaway to share with you. 

Heal My Sole

Recently I had the pleasure of try two of the natural Heal My Sole products.

Bug Spray   Citrus Foot Scrub

                                                  Bug Spray                                  Citrus Foot Scrub


Bug Spray~  I couldn’t wait to try this all natural Bug Spray!  I personally must have that type of skin that attracts skin-pierce-sucking-insects because I get a lot of bug bites throughout the summer. With my passion for gardening and watching my boys ride their dirt bikes, the bugs seem to find me and my sensitive skin.  Well, I tried the bug spray the first day I got it and let me tell you…. IT WORKS.    The boys went riding  their dirt bikes one evening and I decided to go and watch them.  Let me tell you this track was a breeding grounds for bugs but with Heal My Sole Bug Spray, I didn’t have any bites.  The bugs still landed on me but no annoying bites to deal with!  What a blessing to find a bug spray that works and doesn’t have the same ingredients used to peel off paint!

Foot Scrub~  I have personally tried a lot different foot scrubs.  This foot scrub was a bit different from most that I have tried.   Now you know that I have had a few wild back-t0-back weeks and so to trying to find time to pamper myself was a bit of a challenge but I needed to!  I simply sat on the side of the tub and followed the simple steps to relieve my cracked, sore achy feet.  Now this scrub was different because  it didn’t have  those big Epsom Salt deposits that most have for scrubbing.  No this one it so smooth and silky, I told Mary that if I closed my eyes {and had someone else rubbing my feet} I would have thought I was in a SPA.  Seriously, it felt like I was walking on a beach.  Not that coarse Jersey sand either, you know, the silk sands of the south tropic!   For a moment I was in heaven, and I woke up with soft smooth feet again.   I choose the Citrus but the foot scrub also comes in peppermint.


Mary of Heal My Sole is offering one reader

$25.

to spend as you wish!!!

There are so many wonderful all natural products to choose from. 

Mary can even help you create a wonderful gift basket.

Bridal Bucket


To Enter:

Simply leave a comment saying    “HEALING”

Additional Entries

(must leave a separate comment for each entry):

  1. Visit Heal My Sole and share your favorite item by leaving a comment HERE.

  2. Follow Dittle Dattle blog and leave a comment stating that you do.

  3. “Like” on Heal My Sole Facebook and leave a comment HERE stating that you do.

{That gives you 4 possible entries!!!!  Please leave 4 separate comments.}

The giveaway will end on Wednesday, June  1 at 11:00 est

~~~~~~~~~~~~~~~

Good luck everyone!

~~~~~~~~~~~~~~~

But WAIT there’s more….

Mary is also extending a offer

$5 off $30

(use code: Dittle5)

just for Dittle Dattle readers till June 8th!

Continue..

Filed Under:


So this foyer project {of mine} had been dragging on forEVER!  But on Monday, the painter that I met with a while back left word with me that he could come out this week.  I didn’t hesitate to reply back with a BIG “Hell Yes”! 

Which meant that I had to drop everything I was doing  (including the other 4 projects I am working on) to get everything ready to paint.   So a quick trip to the hardware store where you would find me laying out pieces of moulding out on the floor!  Seriously, for all of those who think I’m so prepared and together.  Ha ha.  I laugh.  Laugh at the even the thought of it these days.  My mind is running wildly all over the place.  Bouncing from project to project.

Anyways,  sticking to my story, I went flying to the store with my over-all dimensions and began playing around with moulding right in the middle of the Lowe’s isle!  Now that folks is how ya Get‘r done!!!

With the help of some teenagers, holding tape measures and boards and even popping off a few nails from the cordless nail gun, I beefed up the moulding around my front door and looks pretty darn good too! 

Ya want to see???

{Boring Before}

Old door casing in Black & white

{Wowzer After}

NEW door casing

It’s only primed yet I think it really makes a statement.  Plus, it helps blend into the shelf above.  The cost was around $100. but so worth it!  The moulding on the side are fluted and really added to the cost.  I wish my Dad was in town because he could have made the moulding and saved me about $40. 

The painters are here right now and it’s killing me not be in the room! 

I’ll post the finished photos in a couple of days.

Carrie_thumb[5]

Continue..

Filed Under: ,


I am not finished with my teenage son’s room yet.  For a while now, I have been feeling like he needed some chairs or just something to sit on, and while I have been keeping my eye out for  something beckoning to be made over, I haven’t found anything.  Yet, over and over I kept seeing these sharp looking X Stools.  They are so popular and fit well with a lot of different design styles.  Do you have one in your home?

This one pictured above is from William Sonoma Home – for the astonishing price of $895!

I decided I would make a couple for the end of Austin’s bed, even though he said he didn’t like it and didn’t want it.   I figured these stools will be so flexible that I could always move them in to the “teen lounge” if he really didn’t like them after all.

Now looking at this little stool, I thought it would be easy and quick and I could finish this in a day or two!  Honestly, I started working on a pair over a month and a half ago!!! 

It all started with me wanting to learn how to use Google Sketch-Up.  I spent many many hours trying to self teach myself how to use the program.  I was so excited that I finally had a pattern that I printed off a color copy and took it over to show my parents.   After looking over my design, they quickly told me that it would be stronger if I notched the legs out at the center.  Well, I’m all for making furniture stronger when it comes to having it in a kid’s bedroom. 

Long story short, it can look really good on paper but to printout something that’s useable in terms of a pattern, then you do have to have some woodworking knowledge.  I’m working on it and hope that I can design some projects and patterns that I will be able to share in the near future.

X stoolsHere is where I am now.  The bases need to be primed and painted and the tops need to be upholster.

X stool diy design

Oh, did I mention that I don’t have any money invested it this!!!  Just using up some scrap lumber, foam off an old chair that went to the dump, and some fabric that I picked up cheap a few months back.  Love Love Love me some FREE projects!!!  Have I ever mentioned that I’m cheap frugal thrifty?

x stool fabric choices Now my son has several choices to make…..

      1. What color to make the base? White or Silver
      2. Which fabric?  Pattern or Solid

What combination would you choose?

Come back to see the finished X STOOLS!!

Carrie_thumb[5]

Continue..

Filed Under: ,


Hello! 

I really hope everyone had a wonderful and pleasant weekend.  Our weekend was filled with sunshine here in the Carolinas as the weather popped backed up to 90 degrees after a nice mild week of temps in the 70’s. I think the hot weather is here to stay and we finally kicked on our air-conditioners.  If you know me, that’s huge because I’m cheap {hey, I call it like everyone else see it!}, besides, I moved south years ago to get away from the cold Northern weather.  I say bring on the HEAT! 

Poison Oak Update:  I am feeling much better {thank you for all well wishes}.  It’s down to a mild scratch and not that rip-roaring-tear-your-own-flesh-off feeling anymore!!!  And if you follow me on Facebook then you know that I have been bitten by the garden bug this week.  I have been planting, replacing, moving, and finally got my veggie and herb garden cleaned up and planted.  All of this should have been done months ago.  Can I get a Oh Yeah!!! for the slacker? 

As for this weekend, I’ve been busy with a few projects over in my Dad’s workshop so I can’t wait to show you some finished projects!!!  It’s going to be a great week! 

Carrie_thumb[5]

Tracey from Cleverly Inspired made this Large Library Art.  I love the simplicity of it and anyone could do this!!!

An old once Coffee table Turned Stool by Meg and Mums.

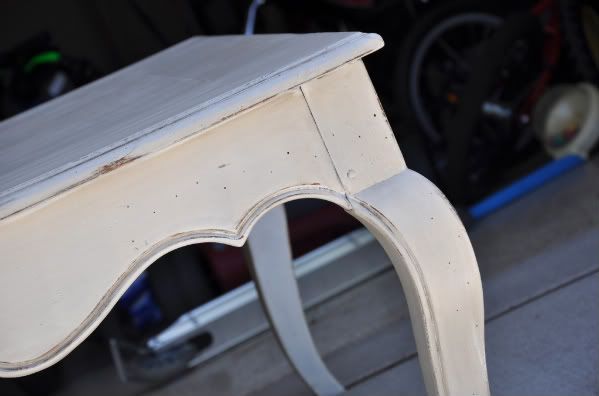
Don’t you just love getting something for FREE?  Fab Rehab Creations picked up this table and turned it into a stylish French Coffee Table.

Photobucket

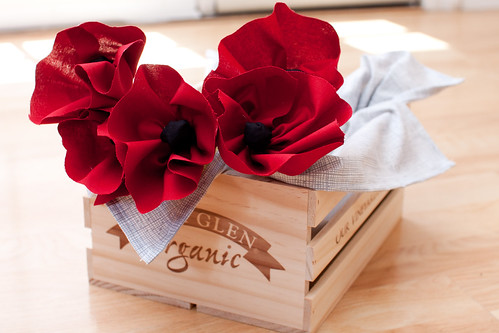
Can’t grow flowers?  How about making them with a Red Poppies Flower tutorial from Jaqs Studio!

IMG_7474

Chicken Salad Pockets by Cozy Home Scenes.  These sound so yummy and easy to do!

Home Frosting shares another great project…. Burlap Canvas Monogrammed Banner

Design a Rug for under your Fire Pit by Second Chances by Susan.  So clever and a great way to add some color!

Amaze Me Monday Blog Party Link Up

Dittle Dattle


You are next...
Click here to enter

 
You are next...
Click here to enter

Continue..

Filed Under:

AD

Related Posts Plugin for WordPress, Blogger...