Showing posts with label beadboard. Show all posts

I needed a way to display my Father's Day Present.  Here's what I came up with.  The best part is I only had to pay for the pictures.  

Let's get started.  First I taped off the sections of the beadboard.  Be sure the edges are secure.

 My tape was a little wider than the section of beadboard so I used one side of my scissors to trim the excess off.
 Press firmly with your fingernail or bone folder.  Paint each section.  I alternated black and white with 2 coats each.

I found pennies that were the same year of each of my kids birthdays, along with my anniversary.  Then I drilled a hole in each of the pennies.

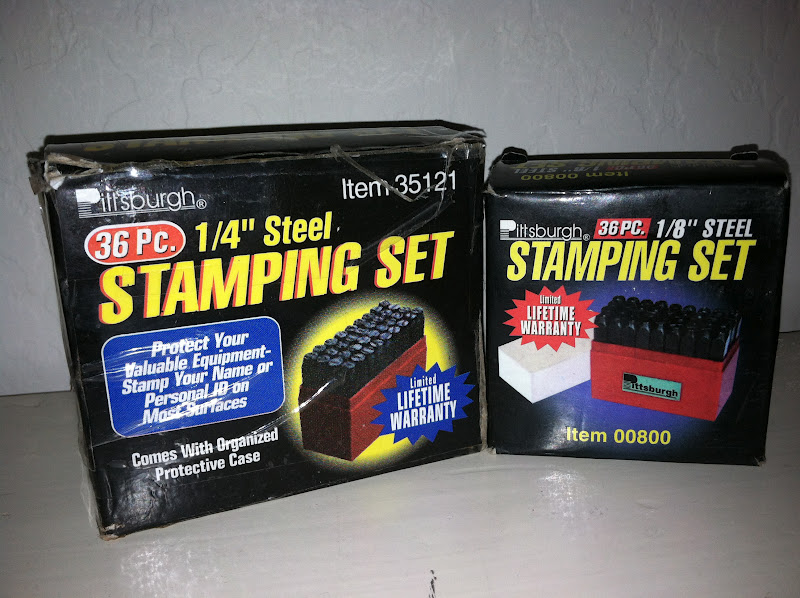
 Next, I stamped each kid's inital on their penny using my stamping set I got from Harbor Freight.  For our anniversary penny I did our initials and an Ampersand.  ie. n&s.

 Next get about 6 inches beading wire.
Start a loop and hold with beading pliers.
 Hold loop flat and wrap the wire around clockwise turning the loop as you go.
 Keep turning until you get the coil you want.
 Thread wire through penny holding coil on front of penny.
 Wrap wire once through the hole on the penny.
 Wrap wire around bottom of frame pressing wire into grooves of the frame so the glass will fit.  Twist wire around first strand and coil again as on the front.  Use a hammer to lightly tap the coils to set them.

 I used my staple gun to staple the ribbon to the back of the frame.

 I heavily sanded the beadboard after the paint dried then added a wooden knob near the top which I also painted black and distressed.
 Here's the top with the ribbon.


I love how they turned out!

Continue..

Filed Under: , ,


 I started this project back when I did the bookshelf, but never got it finished.  I'm so happy it's done.  I love having this up in my bedroom.


 Here's another view.


Now for the how to:  I printed out large letters in the font that I wanted. You could also just purchase pre-cut letters from Joanns, or Hobby Lobby, or Michaels.

Then cut them out and traced them on some particle board that I had.
After cutting the letters out on the scroll saw, I put them on cardboard on top of push pins.  This keeps them off the surface for easy staining and drying. I used ebony wood finish and applied 2 coats.
 While those letters were drying, I used the same stain on the beadboard.  I really like the aged gray color I got with the stain on the beadboard.

 It got a light sanding to reveal a little of the white.
 Next I used some Liquid nails to glue the pieces together. The beadboard was put together along the grooves, then the letters glued on top. It took me a while to decide the exact orientation I wanted with the letters.

 Here's them laid out.  I made the ampersand bigger on purpose.


After everything was glued down, I covered it with a layer of plastic to protect the wood, then something heavy to keep things glued down tight and let it dry overnight. 

Attach your hanging hardware and done!


 I added some black burlap rosettes to the mirrors from Ikea as accents to the beadboard sign.


I am in the process of changing my bedding.  I will share as the pieces come together.

 I'm so excited!  It's going to be gorgeous!

Continue..

Filed Under: ,


Here's a quick update on the kitchen makeover -- 


the cabinets are painted!! 


And last night I added a little detail with some beadboard open shelving.


It's so easy to do!!


All I did was take two cabinet doors off.


Then I bought a sheet of beadboard. 


I measured the openings of the cabinets, and the Home Depot guys cut it for me. 


So easy!!


A sheet of beadboard was $20 and I used less than a third of a sheet for this cabinet.


I bought a sample size of paint --  less than $3 for the paint and got myself an instant kitchen focal point!


 The color I chose was Martha Stewart Rainwater.


I painted the beadboard and then placed it behind the shelves.


The shelves hold the beadboard in place. So I didn't need to even attach the beadboard with adhesive.


Such an easy project. 


And I love the POP of color it adds to my kitchen!!!


(here's a little before shot):


xoxo


I am so excited about this Kitchen Makeover. 


I can't wait to share the whole thing with you!!! 


xoxo


PS -- Another fun "Summer Social" project coming up in the morning from one of the funniest and awesome bloggers around :)


Continue..

Filed Under: , , , ,

AD

Related Posts Plugin for WordPress, Blogger...