Showing posts with label summer social. Show all posts


Jennifer, Jamie and Jodie here from the blog eighteen25!!


eighteen25


We are so happy Jen invited us to participate in her Summer Social event.


We have a fun project to share with you today and it would also make a really cute gift for all the girlies in your life.


friendship bracelet kits


back in june, we took a trip to the craft store to pick up the stuff for friendship bracelet kits and since then, the girls have spent several hours making colorful knotted bracelets for everyone they know. 


to make a kit to keep or give as a gift, you'll need:


  • a DMC craft organizer (ours came with plastic floss bobbins)

  • a pack or two of embroidery floss

  • a small clipboard (6x9)

  • large elastic (to wrap around the box)

  • tag download


we covered our clipboard with some patterned paper and the friendship bracelet kit tag.


and in case you were wondering what the clipboards were for...

they hold your thread while your knotting.


so whether you have a little time left before school starts or you've already sent the kids back...


 get your kids hooked on making these and they can give friendship bracelets to all their new school friends!!


 {if you're new to making friendship bracelets... this website will help get you started.}


Thanks girls -- what a fun idea!! 


If you don't know the girls at eighteen25, head over there ASAP. 


Their site is full of deliciousness, like: 


Back to School Party -- and printable.


And speaking of printables, eighteen25 has tons of amazing printables. Like this Birthday Subway Art.


 And great craft ideas like this Birthday Box.


And they love Halloween as much as I do!! Stay tuned for their Halloween Spooktacular Series -- full of fabulous spooky ideas. I'm so excited to participate again this year!! 


Be sure to hop over to eighteen25 and see all of the awesome ideas!! 


xoxo


Continue..

Filed Under: , , , ,


What an honor to be a part of Jen's Summer Social! Jen and I have been blogging friends for a long time (in bloggy years) and have just recently been able to get to know each other better as we work on the SNAP! Conference team. I can tell you that Jen is just who you think she is from reading her blog, and yes, she really is that nice! I'm pretty sure you could look a long while and never meet a nicer person.


My name is Kendra and I keep a blog called My Insanity. It is where I share all of my crazy/creative ideas. 


And the insanity abounds, but I do like simple projects, too, like this one for a sweet start to the new school year.


Last week my kids went back to school! If yours aren't already there, undoubtedly they will be shortly. Have you met the teachers yet?


Here is a simple and sweet idea for something to take to the teacher on the 1st day of school or a Back to School night, that will leave an impression, without going overboard.


When my kids went to meet their teachers they handed them each an apple with special teacher sticker.


The teachers looked a bit surprised, but genuinely pleased by the gift. Turns out, most teachers aren't actually given apples as gifts in real life. But I want to change that! What better to give them? Practical, portable {edible}, and now personal! (This idea was inspired by these clever valentines we gave last year, thanks to these great printable stickers from Twig & Thistle.)


I designed the apple sticker graphic and then printed out a sheet of stickers on label paper (I used Avery 5408 round 3/4" labels). I tried to create a printable sheet of stickers for you to download here today, but couldn't figure out how to keep the formatting just right (any advice for me about making printables on label templates?).


So if you'd like stickers for apples for your teachers, click on the apple graphic above, and right click and save it to your computer. You can download templates from Avery for the kind of labels you are using. Then fill in the circles with this graphic. This specific template is meant for use in Microsoft Word. If you don't want to mess with templates, just get full-sized sheets of sticker paper and place the graphics all over. You might be able to punch them with a sharp circle punch, or just cut them out with scissors.


 Hope this helps you start off the new school year on the right foot with your child's teacher!


Thanks Jen, for having me!


Thanks Kendra -- what a cute First Day of School gift idea!!


  Kendra is so creative -- I love her ideas!! 


I love this Bandana Tablecloth!!


Kendra also throws FAB parties:


Check out these Nail Polish invitations Kendra made for her daughter's Spa Day Birthday Party!


And I'm loving this Rainbow Cake she made for her son's 1st birthday party


Kendra can do it all-- Craft, Bake and Throw a Great Party!!


Pop over and see the fabulous ideas at Me & My Insanity!!


Have a fabulous day!!


xoxo


PS -- It's almost time to head back to school. Are you thinking about getting organized? I'm sharing my favorite beautiful and organized Pantry Makeovers today over at Babble's Home Ec blog :)


Continue..

Filed Under: , , , , ,


Hello! I am so excited to be posting at Tatertots and Jello! I'm Chris from 


Jen is one of those bloggers whose workload just boggles my mind. I want to bottle up some of her energy! Alas, I have no idea how to do that—yet. Until then, I’ll remain in awe of Jen and all the wonderful things she does at her blog!

For those of you who don’t know me, you should know that I don’t like to spend money. That doesn’t mean I don’t spend money. I just don’t like to. So…when I was looking for some artwork for my bedroom, I decided to look for something free.


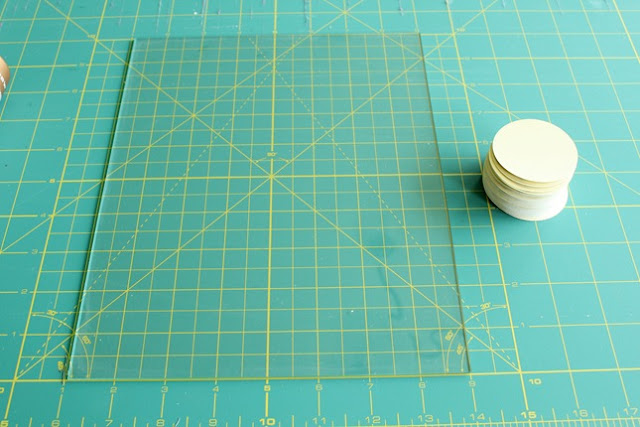
I grabbed some paint swatches at Home Depot (props to HD for offering free swatches!) and used a hole punch to make a bunch of circles.


Punch, punch, and then punch some more. It only took a few minutes, but my frame was pretty small. If you want something large scale, (get it? scale?) it may take you a minute.


Because I’m cheap (didn’t want to buy anything to put it on) and because I’m lazy (didn’t want to find something to cut to size, I adhered the circles straight to the glass that came in the frame. Plus, this allowed me to use the lines of my cutting mat to make sure everything stayed straight. 


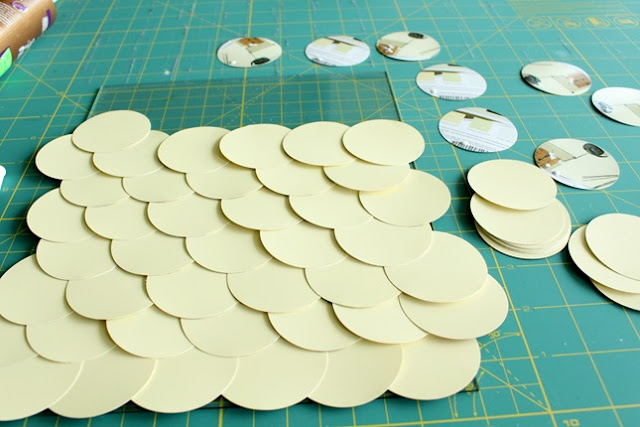
I had to look on the internet to make sure I knew what fish scales look like, and I just started gluing away. A little dab of craft glue at the top of each circle is all it took. Using the craft glue (as opposed to hot glue) gave me some time to move things around if they weren’t lining up well.


This is what it will look like when you’re done.


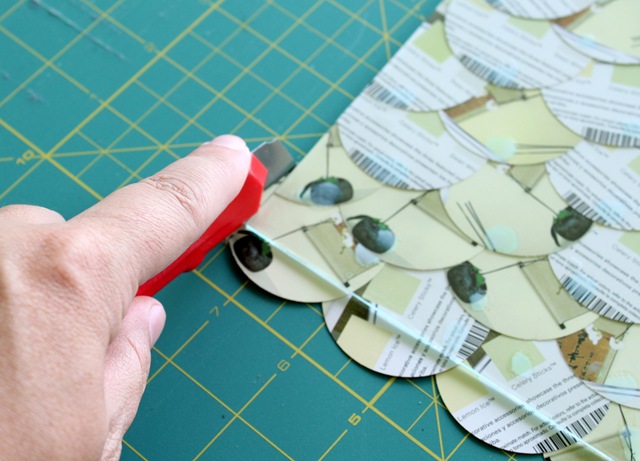
I let the glue dry for a little bit, and I turned the glass over. 


Then I ran a blade down the edge of the glass to give a clean line. This way it would fit nicely into the frame.


Ta Da! I am so happy with the simplicity of it. It’s a fresh and free way to decorate, and I love that it offers some texture to the space.


When my husband was checking it out, I said, “Did you notice that I used a frame that has circles on it to match the circle design in the art?” He responded, “Circles?” Nice.

I’m not too worried, though. I’m sure you notice it. :) 


Thanks to Jen and all her readers for letting me stop by today! I hope you enjoyed it!

--


Chris!! That is just awesome - I love the circles and the scallops that they make.


First of all, I just want to say how THRILLED I am to have Chris here. Just a Girl is one of the first blogs that I ever started reading. I remember the day that Chris featured me - it was one of the happiest in my blogging life. Here are some of the reasons I love Chris's blog---


How genius is Chris's Art Tray? Love this!!


Her Halloween Mantel last year was fabulous!!


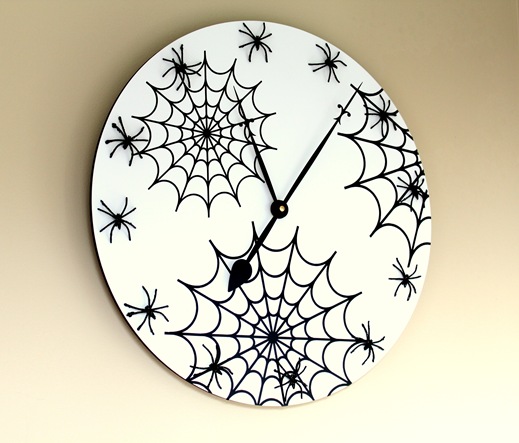
Another amazing Halloween project -- her DIY Spider Clock.


And of course there's the amazing decorating ideas -- like this Dining Room Transformation with Board and Batten.


You will love the daily DIY inspiration at Just A Girl -- be sure to go over and say hi!!


xoxo


PS -- I am sharing some of my favorite Washi Tape projects over at Babble's Home Ec today. I am loving all of the creative ideas that are being shared over there. Such a great community!!


Continue..

Filed Under: , , , , , ,


Hi Tatertots and Jello readers! My name is Ellie G. And I am the president of the Tatertots & Jello fan club. {tee hee} Really, I just love Jen and this blog. I'm so honored to be here.

I blog at Less Cake {more frosting}. I get asked a lot if it's a food blog. And it's not. It's about all the things I love...so definitely food is included, but not exclusive. I also love things like: making stuff, Mod Podge, Diet Coke, graphic design, and frosting.


My husband and I are going on a trip for our 12th anniversary. (can I get a "WHOOT" for making it to twelve?) In the preparations, I decided that it would be nice to take the laptop with us so we can talk to our kids on Skype. But I don't really want to carry it, because I am without a cute laptop bag.

So, of course, I mentioned that I ought to buy a new laptop bag, for the trip.

And I was greeted with, "but we have a laptop bag downstairs."


THIS THING?? Seriously? This is what I have to carry? It's a super sturdy bag, and has lots of pockets that I love. But seriously? My husband is in advertising, and I just yearn for having something that isn't a promotional item! But, alas, my idea for a new bag was shot down. And I am stuck with this little beauty.

But never fear! I remembered what I did last Spring with my new camera bag and I decided I'd try my hand at making this bag less REI and more "Ellie G".


I started with some elastic lace. I actually have a whole bolt of this stuff from a FABULOUS trim and notions store in Phoenix. (that I was introduced to by Miss Whippycake herself!) So I have a lot of it on hand. I love it! It's super vintage-ee and looks like it's already been loved a couple times.

I sewed it on to the front flap of the bag in rows. Because of the elastic, it was pretty essential to pin before sewing. Plus it maintains nice straight rows.


When working with stretchy materials, you really have to compensate for the stretch. In this instance I DIDN'T want to use the elastic properties, so I tried not to stretch. But some stretching is inevitable. So don't do any exact trimming until after you've sewn each strip. You can cut the excess and get a perfect finish!


Manipulating a big heavy bag to go into my sewing machine was tricky, at times. But I really didn't want to disassemble it. This is supposed to be a pretty quick project! There were a few rows I just couldn't work out. So I just hand-stitched the last couple.


Then I used a loop of vinyl to make a cute bow. Just a rectangle, with a strip wrapped around the center to pinch. Easy peasy!

The key to working with thick materials is a really long sharp needle, and upholstery thread. They are essential!


I definitely will feel much more confident carrying this yummy, ruffled bag with me on the plane. I know, I know.....I shouldn't care that much. But I do. So sue me!

You can do this too. Even though you don't have this exact bag! Look at the bags you might want to get rid of, or look at thrift store bags with a fresh eye. You might be able to transform them into something fabulous!!


Oh my goodness Lara-- that is adorable!!!

I love it.


Ellie G. is one of my favorite blogging friends IRL too. We started talking through comments and I mentioned that a new Hobby Lobby had opened up near my house. It turns out that it was across the street from Ellie's house. So we went to lunch and became fast friends!!!


Ellie is one of the most creative people I have ever met. 


I love her projects -- they are a mix of modern and colorful. 


Plus, Lara makes amazing printables!

Like this calendar for August


 {Like this Calendar for August}


And how awesome is this Teacher Printable? Perfect for the first week of school!


xoxo


PS -- I'm in San Diego. Have you ever been here? It's GORGEOUS!! I have a big crush on this town. We had a great time at the Clever Girls Party last night. So fun!!! #BlogHer


Continue..

Filed Under: , , ,

AD

Related Posts Plugin for WordPress, Blogger...