Showing posts with label Christmas. Show all posts


I'm a pretty traditional kind of girl, so when it comes to the holidays we have our
family customs just as any family does, and that, of course, includes Christmas 
baking. I seem to bake the same types of cookies every year, family favorites, 
things my mother baked every year that I now try to duplicate.  

Something funny happened this year though. After rolling out ball after ball of 
cut-out dough, I realized that ALL of the cut-outs I baked were stars. Every 
cookie cutter that I used was the same shape: a star!  Yay for stars!


Ready to go into the oven!


Ready to eat!


What did you bake this year?


Continue..

Filed Under: , , , , , , ,


Wishing you and yours the Merriest of Christmases!


Thank you for coming here and spending a little bit of your valuable time with me!  I am so grateful for you, my dear readers!


Continue..

Filed Under: ,


I wanted to share a few photos of our Christmas decor this year (now that the season is almost over - better late than never, right?)


Things are very simple this year...which suits me just fine.  So please enjoy these little snippets of Christmas cheer from our home this year.


Hope you enjoyed this little glimpse into our holiday home this year!


Continue..

Filed Under: ,


Continue..

Filed Under: , , ,


As long as I'm sharing old Christmas Wreath tutorials, here's another great tutorial I posted originally on December 7, 2010.  Enjoy!


Okay, kids. Here it is. My tutorial on how to make an ornament wreath.


I know that there were several tutorials floating around blogland last year. But, I kind of just flew by the seat of my pants when I made this one. So, I'm going to give you my version of

Continue..

Filed Under: ,


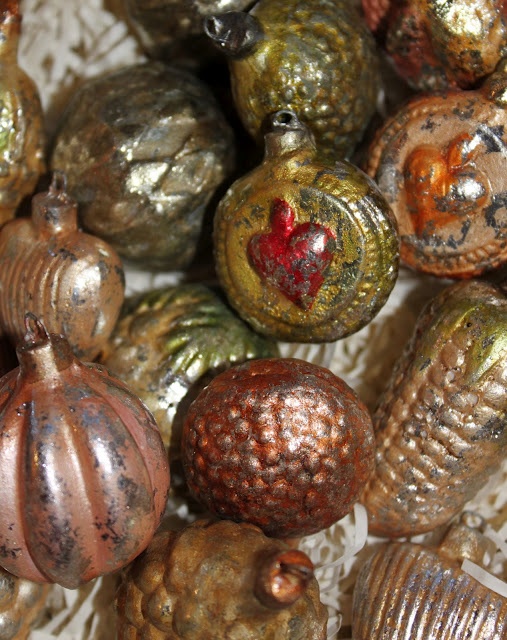
Vintage ornaments are so beautiful and are just the type of thing that I like to look at
 for some creative inspiration. Take a look at these glass ornaments, both old and new, 
and hopefully you'll be inspired too!


What do you think?

Continue..

Filed Under: , , , , ,


I've seen these blocks all over Pinterest and some neighbors got together last week to make some. 
 I'm kind of non- traditional in that I like to take someone elses idea, then tweak it to make it mine.  
Maybe you call it Craft-lift?  I know there is Scrap-lift.  
Not sure about Crafting, but I definitely do it.  Of course I always give credit to where it's due.  
That's just un-cool!  So here's my version of the Behold Him Blocks.


I used Burlap to go on the boards.  
Below are the measurements for the wood. 
 In the original, the bottom "HIM" block is out of a 2x6.  
I chose to use a 2x4 piece.


 I looked all over Google to find this image.  It took me a long time to find just the right nativity image I liked.  I reshaped it in photoshop to fit on my 2x6 board.

Get your wood and cut to size. You can even have Home Depot or Lowes do the cutting for you to save time.
Sand everything.
I painted each piece of wood all black.
Then measured and cut the burlap to fit each piece.
Next I used a sharpie to make the letters.
I drew a simple letter, then filled it in to the shape and font I liked with a thicker sharpie.


For the Nativity image, I layed my printed copy under the burlap.  It's surprisingly easy to see under the burlap.  I traced it, then filled it in with a sharpie.  It's really easy, even though it might not look like it.  I referred back to the original print as I filled in the shading etc.


Then I used mod-podge to stick the burlap to the wood.  
After they had dried, I used carpet tack nails to nail into each corner.  
Done!


It's a really big set so I put it on my pot shelf in the kitchen.  Perfect!


 Be sure to come back when I flip the boards over and turn them into a Valentines Display piece!

Here's to remembering Him this Christmas Season!
Merry Christmas!


Continue..

Filed Under: ,

AD

Related Posts Plugin for WordPress, Blogger...