
Hey TT&J readers!!! I'm Cheryl,
aka TidyMom! When I am not baking, crafting or running around with my camera
you can find me over in my little corner of the universe at TidyMom.net

Like all of you I'm a HUGE fan of
Jen's and SO impressed with how much that girl can do!! I've had the pleasure
of meeting Jen a few times, and let me tell you, she's every bit as sweet, if
not more, in person as she is on her blog.
I share a lot of stuff on my blog,
everything from my favorite recipes to my favorite household tips.
I like to share photography tips and blogging tips, crafting , being thrifty
and makeovers and a little bit of everything in between. I host a weekly
link up party on Fridays where you can share your great ideas, project or
anything you are loving, called I'm Lovin' It.

I thought since Jen was having a
summer soiree, and I loooove to bring food to a party.......what's a summer
time party with out popsicles?!
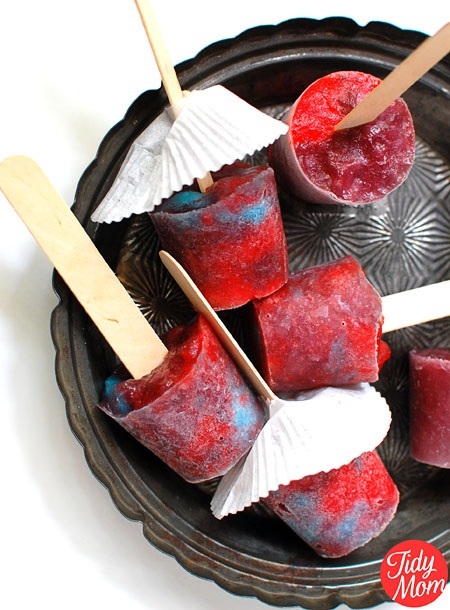
These berrylicous popsicles are so
easy, even the kids can join in on the fun!

Berry
Blue Popsicles
Ingredients
- 6 tablespoons berry blue gelatin
- 1 cup sugar, divided
- 2 cups boiling water, divided
- 2 cups cold water, divided
- 6 tablespoons strawberry gelatin
- 18 Popsicle molds or paper cups (3 ounces each) and
Popsicle sticks
Directions
- In a small bowl, dissolve berry blue gelatin powder and
1/2 cup sugar in 1 cup boiling water. Stir in 1 cup cold water. - In another bowl, dissolve strawberry gelatin powder and
remaining (1/2 cup) sugar in remaining (1 cup)boiling water. Stir in
remaining (1 cup) cold water. - In a small bowl, combine half of the berry blue gelatin
mixture and half of the strawberry gelatin mixture. (so you now have 3
bowls of gelatin) - Place all 3 bowls in freezer for about 2 hours or until
slushy. - In a large bowl, lightly swirl the three colors as
desired. - Fill each mold or cup with 1/4 cup gelatin mixture; top
with holders or insert sticks into cups. Freeze.

Yields: about 10-18 pops depending
on the size.
Enjoy!!
Big thanks to Jen and all of you for
letting me stop by today!! Enjoy what's left of your summer! We started school
this week already!


Cheryl - those look delicious!!
Thank you for sharing them with us! I'm going to make those tomorrow with my kids - they'll think I'm supermom :)

Not only are Cheryl's recipes beautiful, but they are family-friendly and yummy! Like this Italian Grilled Pizza!

Or this Pina Colada Sorbet - delicious!

And not only can Cheryl cook, but she also makes some fabulous DIY projects!! Like this T-Shirt Scarf - one of my favorites!!

And this DIY Burlap Covered Bulletin Board - fabulous!!
I love following along with Cheryl at TidyMom to get great recipes ideas and so will you!!
xoxoxo

PS -- will you be attending SNAP? It's a fabulous conference in Salt Lake April 19-21,2012. I am thrilled to be helping with the conference and we would love to have YOU attend!! Plus, if you would like to speak at the conference, we are accepting applications for speakers.


Filed Under: food, fun things to do with your kids, popsicles, recipes, summer projects


