Yesterday I happened to pass a garage sale on my way to the store. I kind of like that people are having Friday yard sales too now, more opportunities to stumble upon goodies in need of love. I've been working on changing our school room into Emma's room for the past month. I'm not done and ready to show it all yet, not by a long shot, but we're getting there! I moved our school room out to what used to be the play room. 
 She was in need of a nightstand next to her bed, and this piece was only $8 at the yard sale. It was laminate, but I decided to research how to paint laminate and give it a shot. It was only 8 bucks, after all.
 After some searching on Pinterest last night, I decided to try this tutorial from DIY Kinda Girl. I bought a quart of Zinsser Cover Stain Primer. I chose this one because she said it was designed to stick to any surface without sanding. You can click over and read her instructions, but basically I just did two coats of primer, followed by two coats of white paint that I already had on hand.
 I spray painted the knobs because I didn't want to buy new ones.
 This is another thing I added to her room-in-progress, a cupboard door hanger. Check out what it used to look like here. I peeled off the old vinyl lettering and added the peace sign, hearts, and pennants to match her room.
 She rushed to put a few items on her nightstand herself, so much for mom decorating. Ha ha.

I think this turned out to be another great yard sale find. I should be ready to share her room in another couple of weeks. I still need to buy or build a headboard.
Cost breakdown:
night stand $8
primer $8
paint (already owned)
spray paint (already owned)

Continue..

Filed Under: ,


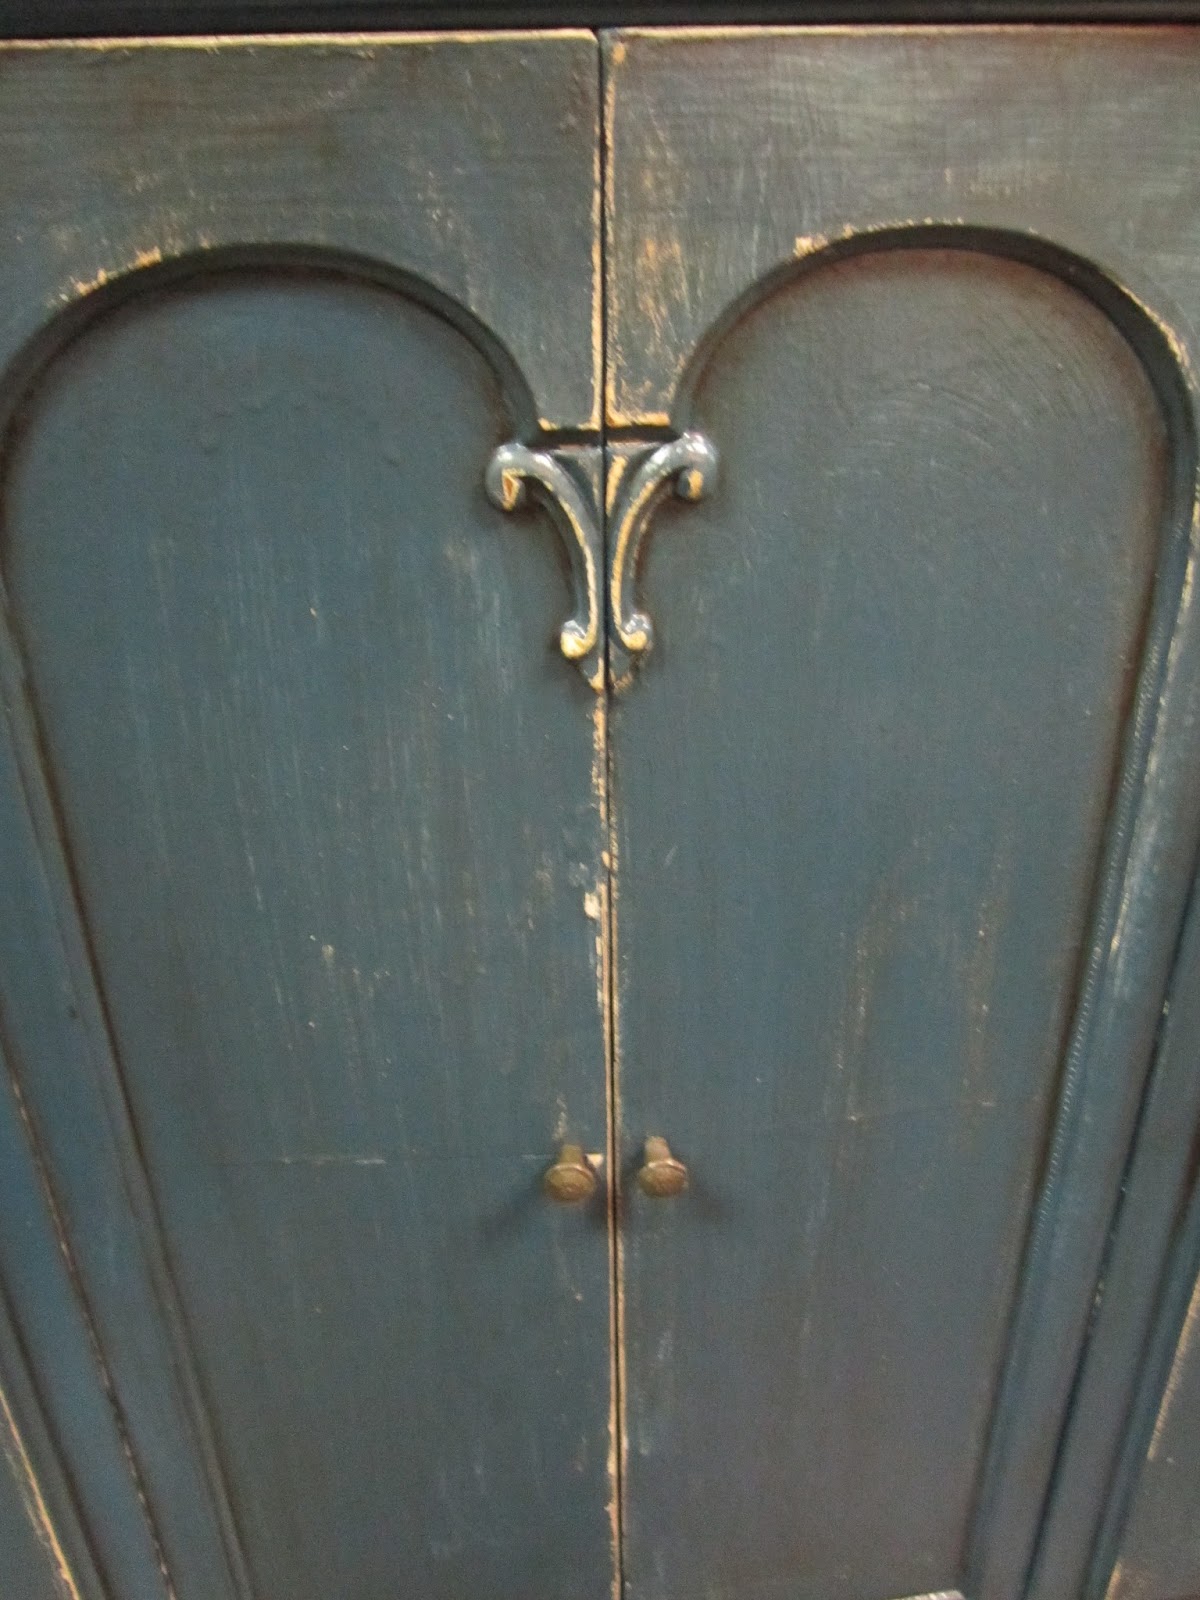
Here's what the cabinet looked like before I painted and repaired it. It was plain white with green trim and flower decals. Ugh.  


Now it's painted a masculine dark blue-gray with a little distressing, which I'm currently loving. Originally this was a liquor cabinet/bar, but I think it would make a great TV console to hide electronic components in a small space.


Continue..

Filed Under:


Yesterday I decided to do something about my hodge podge living room wall. If you look at the picture below, you'll see what it used to be. Forgive the poor picture quality, because of all of the high windows in my house, it's hard to get a good picture during the day. 
First, I realized that I had wooden shutters that I could put up next to the window. These used to be the headboard in Cami's room. I have been working on moving the school room, and giving Emma her own room. Long story short, Emma got the queen bed, but didn't want the shutters as her headboard. I'll post about the new rooms when I get them done. 
I added these two pieces because it felt like it should be symmetrical after I put up the shutters.

 Last week I picked up these two large frames for less than $3 each. Rescued Treasures was having a 50% sale on their frames.
 I didn't know what I wanted to put in the center, but I decided on these wooden detail pieces from Lowe's that were about $5 each.
 The inside of these frames are 11x14. They didn't come with a backing, so I had to make one.

 I cut a thin piece of plywood to fit, and stained one side.I secured them with a staple gun. Since I used this cheap plywood, when I stained it, it resembled old wood paneling (think 70's). I didn't like it, so in the pictures you see, I went back and added burlap, so that you can just see a border of the dark wood.


It has made my living room not look so hodge podge. That wall had looked unplanned, and now it looks like someone actually thought about it.

Continue..

Filed Under: , ,


Designcollector Top 2012 Summer from Designcollector ※ on Vimeo.

Designcollector blog sums up the best videos from the first half of 2012 in a non-stop video mix composed by Alex Frolov aka MrFrukta. Via Design You Trust.

Continue..

Filed Under: , ,


American illustrator Emily McDowell is responsible for these adorable hand rendered type illustrations with sweet and inspiring quotes!You can buy her prints on her Etsy shop here.


Continue..

Filed Under: , , ,


Ok contenders! It's time to link up your best paint projects and go for the gold!

Just in case you missed our projects, here they are again!

I jazzed up this boring old chest using multi-tone stain, spray paint, and chalkboard paint!


Cassie transformed this old bed from boring to brilliant using homemade chalk paint and stencils!


Gwen fixed up this boring, plastic mirror using paint and Martha Stewart glaze!

Glazed Mirror

Now it's your turn to link up your projects!  You can submit any project that was inspired by one of ours, or just has to do with paint of any kind!

We'll be featuring some of our favorites next week!

Don't forget to hop over to Gwen's and enter to win these paints!


Good luck!

Cheers!!

Continue..

Filed Under:


I'm a chick Obsessed. As with any new adventure, I DIVE right in. I usually come up for air later on with just a few scratches...  Being this one has been a long term dream, it casts an even more surreal glow effect. Many thanks to Small farm Girl for her comment to my last post on the dilemma of contrasting decor themes. As to the subject of the Vintage camper decor, she suggested "Why not do both!". I began to think intensely upon those words and realized, if I change the Blue of the one choice into Turquoise and add some reds, rustic oranges and other desirable's in there to POP- I could mesh it together for the balance I sought. So the hunt began as I embraced my admiration for the Gypsy interior using Turquoise but keeping things middle road enough for The Captain.
I have contemplated some solar light self made lanterns to use with the camper being MANY candles in such close {and OLD} quarters is a bit scarey. Our local dollar tree has the landscape spike ones for $1 a piece which I knew fit perfect for my plans. the lanterns can be hung on the canopy or set on the ground in the sun during the day to charge & placed about for their evening enjoyment. I'll share a tutorial if you can wait that long but there are plenty of similar ideas on the net.
I am SO making a few of these knotted rope holders but a trip to the flower factory will produce much nicer glass vessels then mason jars {no proper gypsy chick would use Mason jars when they could be holding gems from the garden bounty~ unless of course they were tinted...}
Tutorial found over here at marthe Stewart living:

Speaking of tinted jars,I do believe this is pure WOW!
Who knew something as simple as GOLD puffy paint & food coloring dyed Modge podge would transform jars into Moroccan inspired lanterns! http://www.designsponge.com/2011/03/diy-project-moroccan-lanterns.html
Maybe not as perfect as the real thing but close enough! and boo coo bucks saved in the process.
Now how about a Moroccan inspired rug.Oh, the bust the budget price tag making you TRY to ignore the want? Then why not try out this tutorial using a shag rug and Rit dye!! Yep. Over at gorgeous & shiny things, you will find yourself in awe over the transformation you can create.
Has me turning the wheels on how I can transform a colored rug using bleach in place of the rit dye for some "milk thistle lily damask" Gypsy designs. Now where's that Bleach gel pen.....

Little brother Army brought me some very pretty scarves/shawl pieces from his time in the Middle East. He also made the mistake of showing me the bounty he still has filling rubbermaid containers when I helped them move from across (or is it diagonal) the country. I may have to seek out his willingness to part with a few more textile items in my color palette.
 Over the last 6months I have noticed a few similar scarves with the gold thread woven in at the thrift stores. Of course at the time I resisted snatching them without a clue what i would do with them. Now? I'm smacking the forehead with after thought. while making mentals to start snatching away!
Picture & tutorial via American Gypsy
Over at American Gypsy {whom has inspired today's post}, has shared a way to get those exotic pillows using scarves. Of course, you could use throws or other large pieces to make pillows for the bed or floor lounging. Luckily I found her as I mooned over exotic pattern pillows, rugs and blankets. Scarves run a whole dollar at the thrifts here and textiles all run under $4. Now if I could only find the color scheme I desire, I would be set!

Now as for a piece to use on the outside of My Gypsy Chick caravan, an AWNING! Over at "This Montana life", you will find a very helpful {and again boo coo buck saver without the reduction in Glam}, easy Awning tutorial!  http://thismontanalife.com/make-your-own-awning-step-by-step/

One must have something, after all, to make shade as well as hanging those solar lanterns upon.

I truly have not a single idea on what color route to go with {burgundy? green?, ?,?} I am leaning to a solid color top with Indian influenced shape scallops. This is the Mediterranean scallop found via four seasons tent masters:
 Yep. That's the shape I want hanging from the edge of the awning. Thankfully I have all winter to tackle that project.
Thank you for all the encouraging words & sharing in the happiness of my newest adventure. As you know, I'm all over the map.  Now you can throw in some Vintage Camper remodeling to the mix.
I go this Friday to measure her tires and HOPEFULLY find a used pair before bringing her home. otherwise she will be riding a landscape trailer. Who knew camper tires would be such an ordeal PLUS cost more then car tires? Gently Used tire shopping at boat yards & RV repair shops is in my future.
Sweetest dreams,
~Tammie

Continue..

Filed Under: , , , , , , , , , , ,


Yesterday my wonderful hubby turned 33! A few months ago, I made Bakerella's yellow cake and fell in love. My husband is crazy isn't big on chocolate, so I made the next best thing! This cake with a classic buttercream frosting SCREAMS wedding cake to me. 

Now, I must admit, there has been one time when I made this cake, and it didn't turn out great. For my 30th birthday I think I over-baked it and dried it out. It was also the hottest April day we'd ever had and it spent the whole day in the fridge and it was super dry and crumbly by party time. Trust me when I say, if you make this cake right, it will be like the old fashioned cake your grandma used to make. It's super easy and only has a few ingredients, just don't over-bake! So yummy!

Continue..

Filed Under: ,


Tracery Interiors

When I came across this gorgeous photo the other day, it made me stop and stare. I just couldn't believe how charming these chippy, distressed wooden walls looked. I'm use to distressing furniture, but this takes distressing to an entire new level. I would love to try this application on a paneled wood wall or wood beam ceiling someday. 


For more inspiration, check out these amazing interiors by Tracery Interiors. Their team does an amazing job designing these homes.


I love all the neutral color palettes used throughout these spaces. They all have a classic and timeless style that will not tire throughout the years. I'll definitely be referring back to these photos for inspiration when we build a house.

Thanks for stopping by. 

Continue..

Filed Under:


Times are busy! I am preparing for lots of upcoming vintage fairs this Summer and Autumn, including one next weekend in the lovely north east town of Banchory, Aberdeenshire. This is the first of hopefully many organised by LK Vintage and will feature antiques, collectables and crafts by various local businesses - and me!

Not only have I collected some fabulous vintage china, trunks and kitchenalia, I have also been busy making stuff (in between the feeding, playing with and rocking to sleep of my baby!). I altered a throw by dying it charcoal grey and adding applique fabrics to it; I revamped a rocking chair and a vintage sewing box - and upcycled some saucer-less teacups into muffin-like pin cushions. Hey-ho, how crafty am I!

If you're in the area, do pop in and say hello:
Date: 30 June 2012, 10am-4pm
Details: Banchory Town Hall
High Street, Banchory, AB31 5NA

Open to the Public from 10am to 4pm / Admission Fee 50p

Here are some photos of what I will have available on Saturday:

My pin-cushion-teacup-muffins £10 each

A lovely stack of blue floral cups and mugs by Hornsea, Pontesa and Tams ware. Mix and match for £3 a cup
Upcycled sewing box £15
Perfect sugar and cream set from the Royal Doulton 'Frost Pine collection' £12
Upcycled rocking chair and steamer trunk. Trunk £40, chair £75

Retro picnic basket and mugs. Picnic basket SOLD ALREADY!. Mugs £6 each
Dyed and appliqued cotton throw £25


Continue..

Filed Under:

AD

Related Posts Plugin for WordPress, Blogger...