Welcome to this week's edition of Frugal Friday.

Last week's party was so much fun to look through.  I don't normally just feature room makeovers for my frugal round-up, but there were so  many great reveals linked up last week, I just couldn't help myself.

For my frugal round-up, here are a few of my favorites...

Urbane Jane shared an adorable nursery reveal!  I love the serene color scheme.

Continue..

Filed Under: , ,


I love granola.  
Although I wouldn't necessarily call myself a 'Granola' which brings images of Birkenstocks and Hippie Drum Circles to mind.  But I am a whole grain, working towards all natural foods kinda girl.  

I'm not quite ready to give up white sugar completely just yet, but in this recipe, I have.

I also have a friend that is a vegan.  This recipe would totally work for her.  
No butter, no eggs.

I kind of came up with this recipe as a hybrid of my previous Granola recipe
and one I learned at Shar's.  
I wanted to try a dairy free version that packed in some wholesome goodness, 
and still not turn out tasting like cardboard.  Yuck!  
I'm really pleased with the result and it has become my breakfast of choice lately.  
Although I did go to a Shar's class again today and they made some heavenly cream of wheat.  

Did I just type that?  Heavenly...Cream of Wheat?  Yep. 

It was the class favorite and it will certainly be breakfast for the fam tomorrow. 
 I will share.  I promise!


OK.  Back to the granola.

Health-i-fied Granola
(vegan)

First get 1 cup of Raisins.  Put them in a little bowl and cover them with water.  Let soak while you assemble the rest of the ingredients.

In another small bowl combine 3 Tbsp Chia Seeds and 6 Tbsp water.  Stir slightly and let sit.

Get out the following:
1/4 cup pure maple syrup
1/4 cup honey
1/4 cup coconut oil
1 apple
1 ripe banana


Let's assemble the dry ingredients while the raisins and chia seeds soak up the water.

You will need the following, although it's completely flexible.  I'll just share what I used.

7 cups Rolled oats. (again, my favorite is Honeyville rolled 6 grain cereal)

2 cups coconut
2 cups chopped nuts of your choice.  (I used sunflower seeds, pumpkin seeds, and chopped walnuts and almonds)
1/4 cup popped amaranth
1/4 cup ground flax

Now let's put the wet ingredients together.

Put the soaked and drained raisins, chia seeds, peeled banana, cored apple, maple syurp, honey, and coconut oil in the blender and blend until smooth.  It kind of looks like peanut butter to me.


Now add the wet ingredients to the dry and stir thoroughly.


Lastly, I put the granola on my dehydrator trays and let dry for about 4-6 hours.
I did try baking it as described in my previous recipe and it was still to wet.  I like it more crunchy.
The dehydrator was perfect!

You could easily add some craisins or dried cherries or blueberries at this point. 
Although this time I didn't.  I probably will next time, or go throw some in now.  Maybe.
I do have some craisins. Mmmm...

 Store in an airtight container.


Here's my breakfast of choice... well and champions!  
At least in my own mind. ;)

Equal amounts of granola and homemade applesauce.
No white sugar anywhere to be found.
Yeah me!


I hope you like it as much as I do!
Yummm...

Continue..

Filed Under: , ,


Today, I am loving this office / conference room space. Monochromatic but ethnic chic at the same time, where the tribal patterns give more life to an otherwise black and white space. 

Photo Credit  - via

J'aime beaucoup cet espace de travail / salle de réunion ou une gamme monochromatique et un univers ethnique se mélangent harmonieusement - les éléments tribaux viennent donner vie à un espace autrement noir et blanc. 

Continue..

Filed Under: , , , ,


Our home is 23 years old. There are a lot of things that I wonder about since we moved in almost six years ago. 

1. Why on earth did the contractor place certain electrical boxes in strange places?
2. What the heck was the soffit hiding up there above my cabinets? Wasting space in my 
     opinion.
3. When would Rob want to start ripping cabinets and other items out to find answers to 
     these questions?

Well the answers to the last two questions were figured out on Sunday. The first question will never be answered probably.  The day after the ice cream party Rob took on the task of ripping out cabinets and soffit. First thing that came out was the small cabinet above our enormous refrigerator.  It served no purposed when even I at 5'10" could not easily reach it.

Thankfully the old fan above the stove was coming out as well.  It was gross and I wanted to somehow put a microwave up there in the future. We are tying to figure out now how we can go about putting that into the plans. Considering microwaves are actually less expensive than range hoods I may get my way.

Taking the soffit out was no easy task. However, we are glad we uncovered it because we found many surprises behind it that should not have been back there.  Including a hornet's nest and stink bugs. Can stink bugs just get up and leave already? I'm sick of them.

We finally figured out what the soffit was hiding. It was a simple pipe that jutted out just next to the window.  See it below in the top left corner of the photo? No electrical wires that were too complicated existed in there.  Thankfully we know of an excellent plumber who does work on the side. He came over last night and simply drilled a hole in the two by four above it and moved the pipe up. That way it can be in between the ceiling and the drywall.  He also did it record time too.  

The next steps are having an electrician come over to make some changes in the lighting and placement of junction boxes.  Rob hopes to start dry walling the now uncovered soffit and missing ceiling after that is all figured out. This project is going to take a while that's for sure. But, it will be worth it.

I do have two questions though...

What is your favorite counter top product?  & Have you ever purchased butcher block counters from IKEA? Any advice on either of these would be greatly appreciated!

Total cost for this project so far is $20 since the demo was free. :)  Thanks to my father-in-law for hauling away the debris and we are keeping the old cabinets to place in our garage for storage (at some point)

Thanks so much!

Megan


Continue..

Filed Under:


Thanks to those of you who volunteered to donate something to give away.  Starting next week, you will have a chance to win something when you link up and/or visit the sponsor's page.  Still working out a few kinks.  So while I get unkinky, check out some linkys:

Love everything about this industrial, rustic mantle from Too Much Time on My Hands
Rustic Industrial Mantle & Ceramic Deer Head 3 copy
Update your kitchen for less than $50 from Newlyweds on a Budget
Try Blissful Root's recipe if yummy, healthy goodness!
Martha Leone Design's update an old dresser.
Boxed Empire 6 MarthaLeoneDesign
Love, Pomegranate House's valentines are what my daughter wants to make this year!
Cute shark tutorial from Super Baby Boutique

I look forward to seeing your links.
Please remember to read through the guidelines before linking up!  Thanks for linking up and for sharing you with us.
Under $100 Linky Guidelines:

1. Please link to the specific post, not your blog!
2. Please only post ideas that cost $100 or less--it would be great if you share the cost of your project, but not necessary.
3. Please include a brief description in link up.
4. Grab my Under $100 button on the sidebar and include it in your post or a link to Beyond the Picket Fence so people can find you and more great ideas.
5. Please check and make sure your link works. If it doesn't you can delete it and try again.
6. Please no direct links to sales sites, i.e. ETSY or just a plain ol' commercial site, we are looking for inexpensive ideas we can recreate.
7.  Please do NOT link up the same thing week after week--keep it fresh!

Continue..

Filed Under:


How many days have gone by where you planned to get certain things
done but then at the end of the day you realized that you accomplished
almost nothing that you set out to do that day? It happens to me once in a while. 
create my daily list of things to do - with good intentions of course - and I check my
 list on and off throughout my day, but sometimes, other things just get in the 
way. Sometimes when I am working, a new idea will come into my mind and sidetrack
 my focus, or other things will come up and before I know it, the day is over and my
to-do list remains undone. Worst of all, I felt like I had wasted time! 

 This reminded me of something my vocal coach taught me years ago when I was taking 
singing lessons. She used to tell me to "Use the air, don't push the air" when singing. 
This piece of advice was a true method to making someone a better vocalist. Now,
years later, I think of her words again, but this time they have a new meaning to me. 

Will I use my day, or will I push through my day?

Even more importantly, and on a much bigger scale, will I take the time that I should 
to do the things that I've always dreamed of doing, or will those things somehow get
pushed away too? I'm choosing to pursue all of those dreams, and to use every second
 of my time on this earth thoroughly and completely.

How about you?    


Continue..

Filed Under: , ,


I came across this great idea from The Inspired Room and just had to give it a try. She used old book pages to make framed art, but I decided to use vintage sheet music instead. Both will work just fine for this project.


This project was great for all of those empty frames sitting around our store. I enjoyed making this framed artwork because it was SO simple and I already had all of the materials I needed on hand.  


Here's how to make your own framed artwork.

ONE: Find a large frame to paint.
TWO: Choose a book to rip apart.
THREE: Arrange the book pages to fit inside your frame.
FOUR: Use double sided tape and attach the book pages to each other.
FIVE: Cut foam core board or cardboard to your frame size.
SIX: Use spray adhesive and attach the book pages to the board.
SEVEN: Staple the back of the board to the frame.
EIGHT: Hang your frame and admire your DIY Framed Sheet Music.


Continue..

Filed Under:


via

Continue..

Filed Under: ,


 I'm kind of a sprouting newbie.  I do mung beans regularly, along with other things, but I've  never tried sprouting wheat for my bread.  I always thought, "How do I get the watery sprouts to grind up for flour, or how do I add sprouts to my bread and not feel like I through in a handful of grass?"  Not to appetizing.  I do know that sprouting exponentially increases the nutritional value of a seed or grain.  Soaking it in water tells the kernal that it's time to grow so it releases all the good stuff that's dormant inside.  The vitamins and minerals and protein content goes up dramatically.  Plus it just makes the bread taste that much better!  I promise!
It does take some time, about 36 hours.  

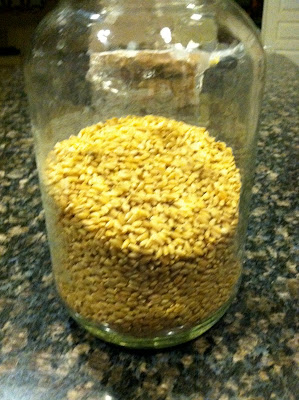
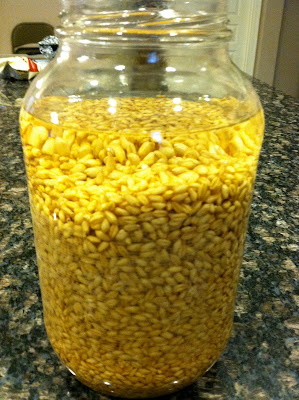
But sprouted wheat bread is Oh, So worth it!

So let's start at the beginning.  Get a large jar.  I'm recycling a large Pickle jar that has been washed.
The ratio of wheat to water is 1 part wheat to 2 parts water.  So fill your jar or other containter up with the appropriate amounts.
Set the jar aside and let sit.


After 12 hours change the water in the jar.
This is what it looks like at 24 hours.  
The wheat kernals have swelled considerably.
You can now see the tiny tails that are just starting to poke through. 
This is as far as you need them to sprout. 
Don't leave the wheat in longer than 36 hours as they will start to grow undesirable bacteria.

Drain water and spread the wheat onto a dehydrator drying tray.


Turn the dial down on your dehydrator to no higher than 148 degrees.
This keeps the newly emerged vitamins and minerals still viable.
If you go too hot, you just killed the vitamins and they won't do you any good.


Here's a close up of the kernals.  
You can kind of see the little tails on each berry.
I let my dry overnight, or about 10-12 hours.


Here's the berrys dried.  
They are still slightly swollen from a normal wheat berry, plus the little tails.

Grind the wheat as normal.  
Just make sure they are completely dry.  
You don't want to put wet grain into your grain grinder.  
For this batch of bread, I didn't sprout enough wheat, so I added a 1 cup soft white wheat, and 2 cups hard red wheat to my grinder and blended it all up together.

Now to make bread.

Sprouted Maple Apple Oatmeal Bread
(a mouthful I know, but oh so yummy!)

Get out your large mixer, I'm using a Bosch.  
You'll have to half the recipe if you're using a Kitchen-aid.

Layer the following:
4 cups warm tap water
1/2 cup applesauce or oil (I prefer to use applesauce)
1/2 cup pure maple syrup
1 Tbsp maple extract
2 eggs
3 Tbsp dough enhancer
3 Tbsp vital gluten
2 cups rolled oats (my favorite is Honeyville's 6 grain rolled cereal)
2-3 cups fresh ground whole wheat flour
3 Tbsp yeast

Mix for about 1 minute.  Let rest 10 minutes.


Add the whole wheat flour one cup at a time until the dough cleans the sides of the bowl.
I added about 1-2 cups of white flour, but you can stay with the whole wheat if desired.
Knead for 6 minutes.


While the dough is kneading, in another container you will need 4 cups coarsely chopped apples.
Since it's not really apple season right now, and I had some canned apples in water that I decided to use.
You could also grate a few fresh apples with the same fabulous results.


I measured out what I needed and cut the pieces up with my pastry blender.


After 6 minutes of kneading, add the apples and 2 Tbsp sea salt.
I learned this trick recently and I will use it forever after.
Salt kills the yeast and when you add it towards the end of the kneading cycle, the
bread raises higher and better.
I also added about 1-2 cups white flour here because adding the apples greatly increased the moisture
and the dough got too sticky.  You don't want to add wheat flour at this point because there won't be time to develop the gluten in the newly added flour.
Knead for another 3 minutes.


Turn the dough out onto a well oiled surface.
Shape into loaves and place in bread pans sprayed with cooking spray.
Slash the tops with a serrated knife or kitchen lame.(that's a special bread knife just for slashing dough)
Sprinkle the tops with oats, cover with plastic and let rise until about 1 inch above the rim of the pan.


Preheat oven to 400 degrees.
When the oven is ready, place loaves in oven and drop temperature to 350 degrees.
Bake for about 35-40 minutes or until internal temperature is 210 degrees.

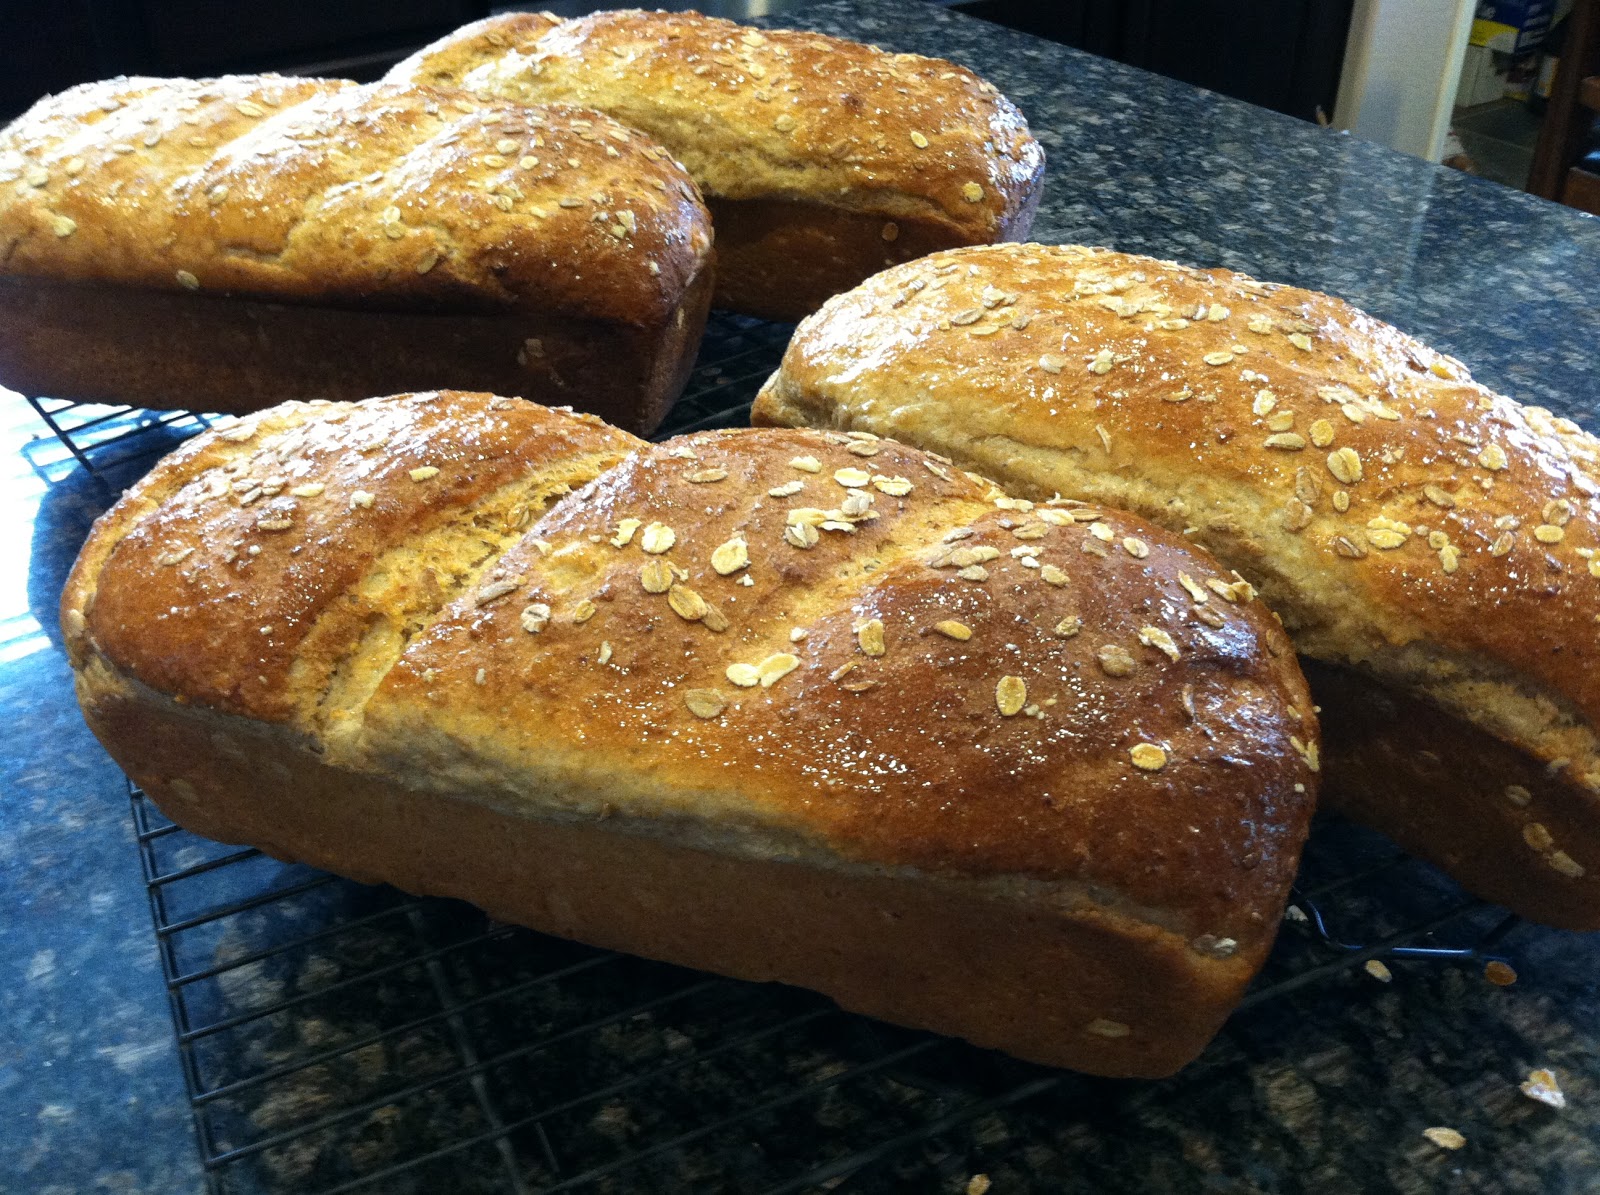
Remove and place on wire racks to cool.
I brushed the tops with shortening.


This bread is light, fluffy, and super yummy!  
Plus you packed in a whole lot of sprouted whole grain goodness!


Mmmm... sprouted whole grain bread.  
It's an amazing thing!


Continue..

Filed Under: ,


Oh my goodness. Did you know that Valentine's Day is in two weeks? Oh, you did?  I see.

Normally, I'm the kind of gal that puts out the Valentine's decorations in mid-January.  But somehow the month got away from me, and I just realized that February starts on Friday. 

Friday? 

Friday! 

So here I am, two days away from the Month o' Love with nary a Valentine-related decoration to be found

Continue..

Filed Under: ,


I found a great idea for party food on Pinterest a while back and it was from Ally Cakes's site.  I decided to do it for Wynn's party. They look so pretty and make it a lot easier for people to enjoy rather than standing around one dish with veggies on it.


I made some chocolate lollipops from candy melts and a plastic mold.  Then I put them in a glass spice jar with some sugar and sanding sugar. Then I decorated the outside of the jar with some ribbon from a set from Michaels dollar section.  I saw a pin for lollipops from an Etsy Shop and decided to buy the mold and try it myself.


Thanks for stopping by!

Megan

Continue..

Filed Under:


Love and a little junk that is!  This is a quick project--simply find some extra junk to spell out LOVE!

The L is an old chair spindle, the O a baby doll buggy wheel.
The V is an unidentified metal piece.
I used some pieces from a child's wood tool set for the E.
The longest part of this project is the time it takes to find what junk you will use.  I will be making a few more to put on etsy.
I am linking up at Green Willow Pond and Funky Junk interiors.


Continue..

Filed Under:

AD

Related Posts Plugin for WordPress, Blogger...